How To Use
Login
-
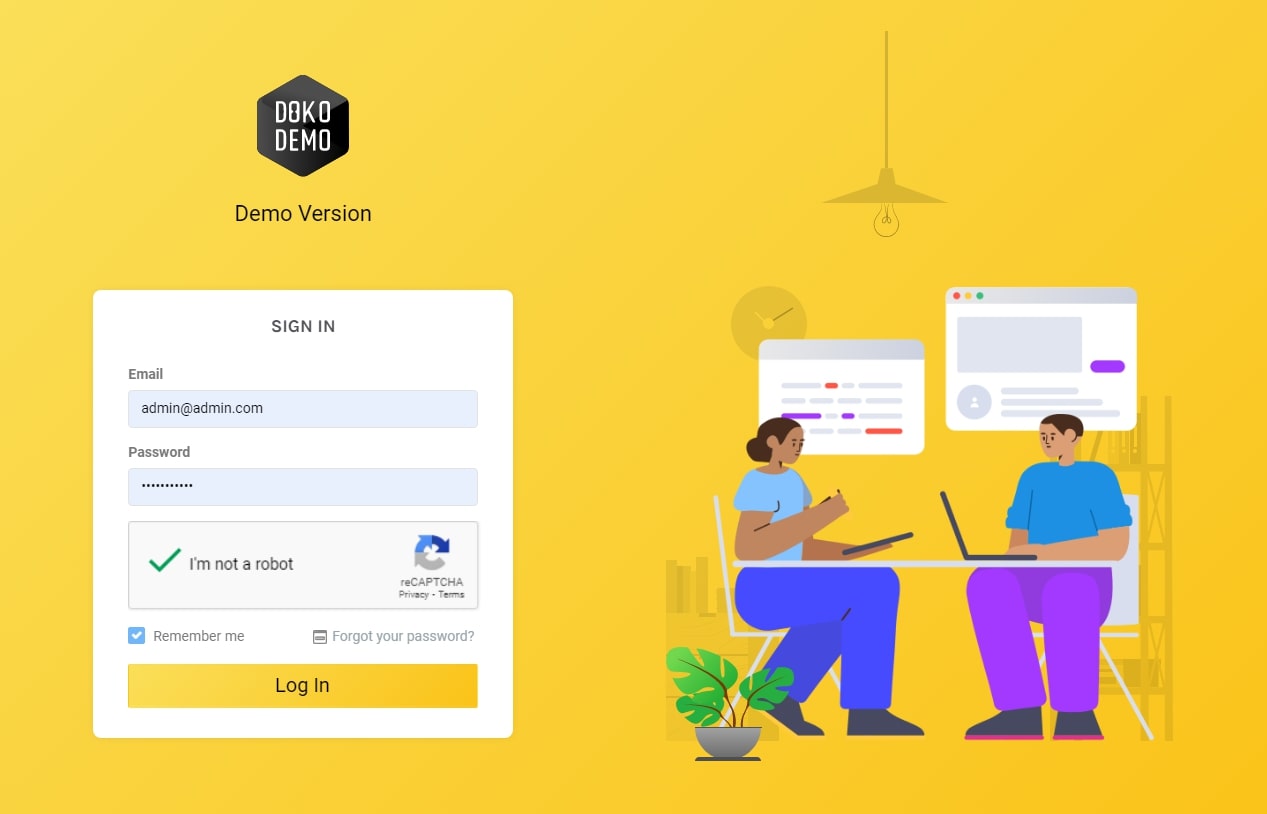
Login
Enter your registered email and password and then check the captcha box.
-
Remember Me
Selecting this feature stores your email and password data.
-
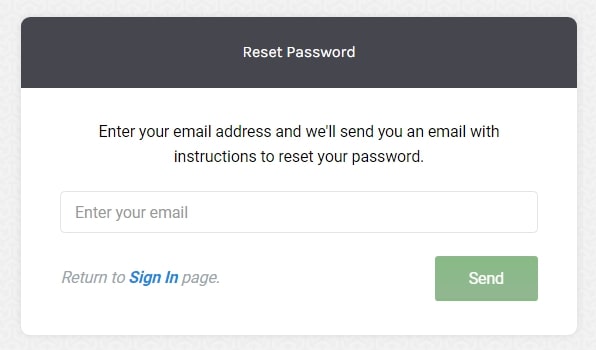
Forgot your Password
This feature is used to retrieve a user’s password if it has been forgotten. Here’s how to recover your password:
- Click on the ‘forgot your password?’ option in the login page.
- Enter your email address.
- A password reset link will be sent to the user’s email.


Homepage – Admin
This is Dokodemo-Kerja’s main admin page. This page cannot be accessed by regular staff, and contains the various features described below.

- Filter by Team: This enables users to filter through data by Team.
- Filter by Staff Name: This enables users to filter through data by names of staff.
- Filter by Date: This enables users to filter through data by date.
- Daily: This feature displays employee working hours per day.
- Weekly: This page displays employee total working hours for 7 days / 1 week.
- Monthly: This feature displays employee working hours for up to 1 month.
- Edit Time Tracking: This feature allows the user to edit the time recorded within the time tracking menu.
- Show Data: This feature comprehensively displays employee data shown on each page
- Pagination: This feature moves the user to the next page.
- Detail Staff: This feature displays time tracking data, allowing the admin to view notes, edit the time history, screenshots, session, and location of staff members
-
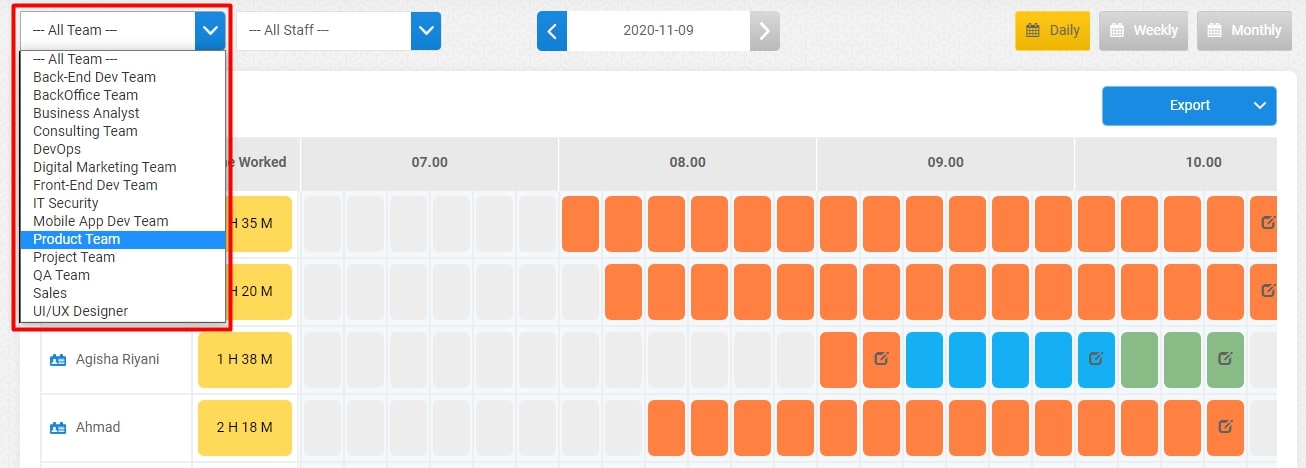
Filter by Team
This allows the Admin to filter through time tracking data by Team. After selecting the Team name, the website will display the time tracking data of all employees within that Team.
-
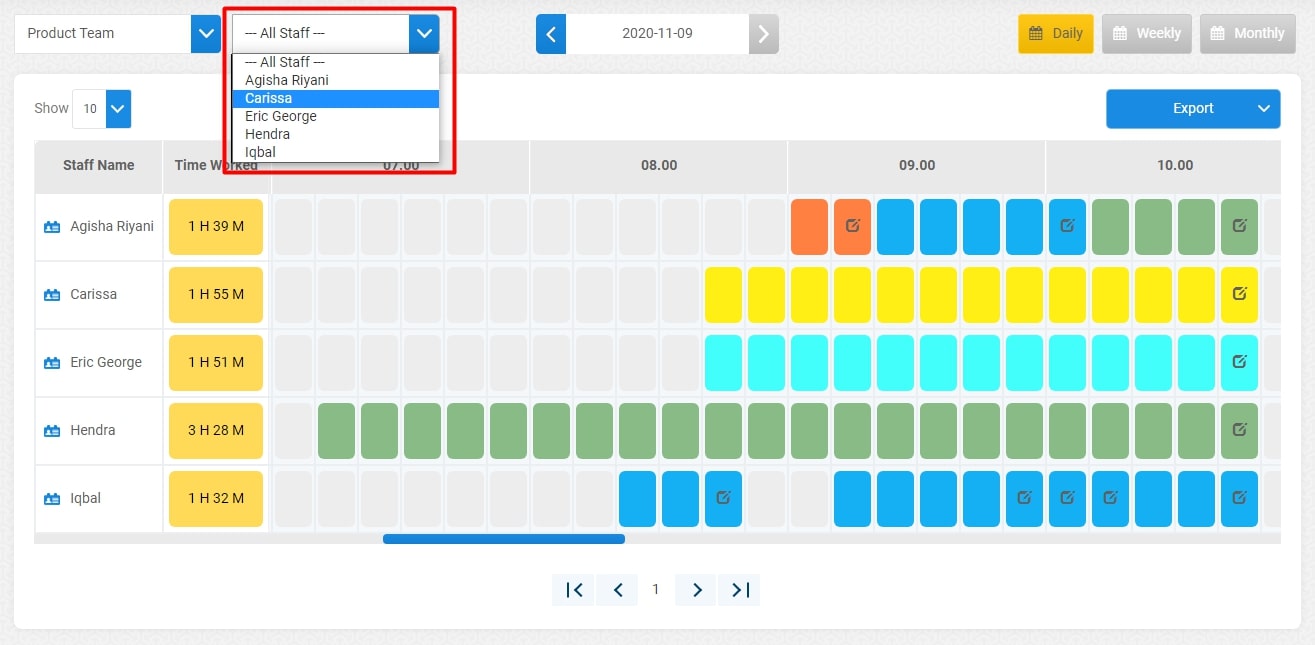
Filter by Staff Name
Through this feature, Admins can filter through time tracking records based on employee names. After selecting an employee's name, the website will display the selected employee's time tracking data.
-
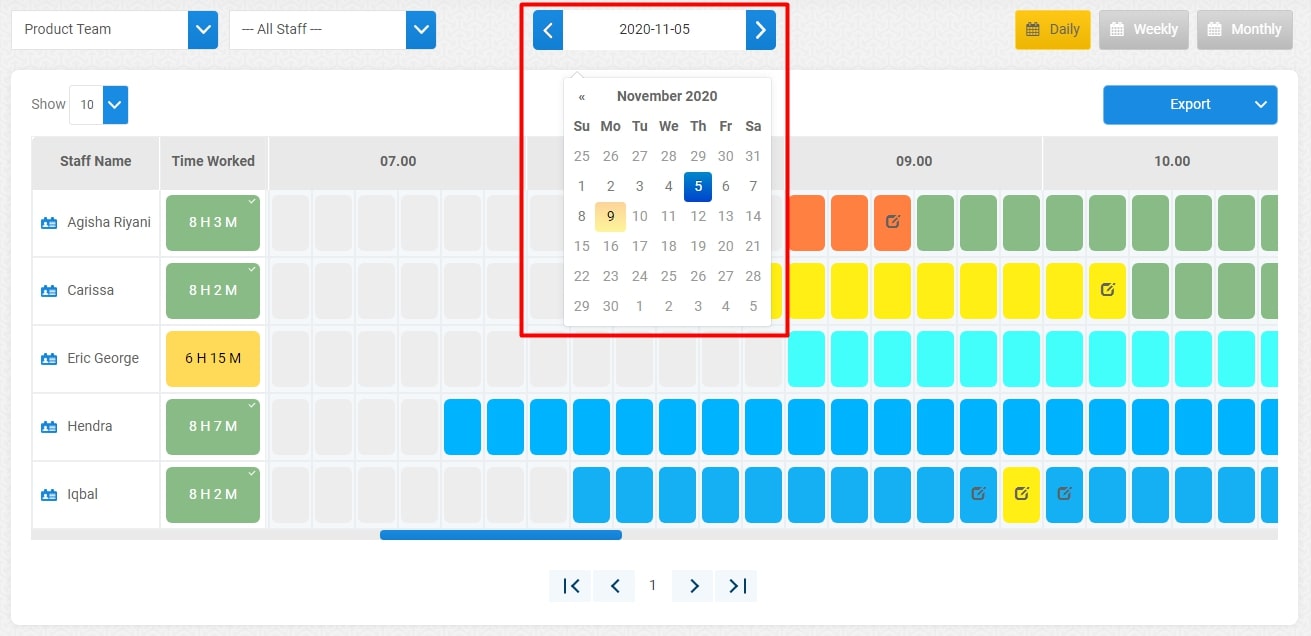
Filter by Date
Through this feature, Admins can filter through time tracking records based on a specified date. After selecting a date, the website will then display the time tracking data of all employees within the chosen date.
The blue coloured date (on the calendar) shows the chosen date, while yellow shows the current date.
-
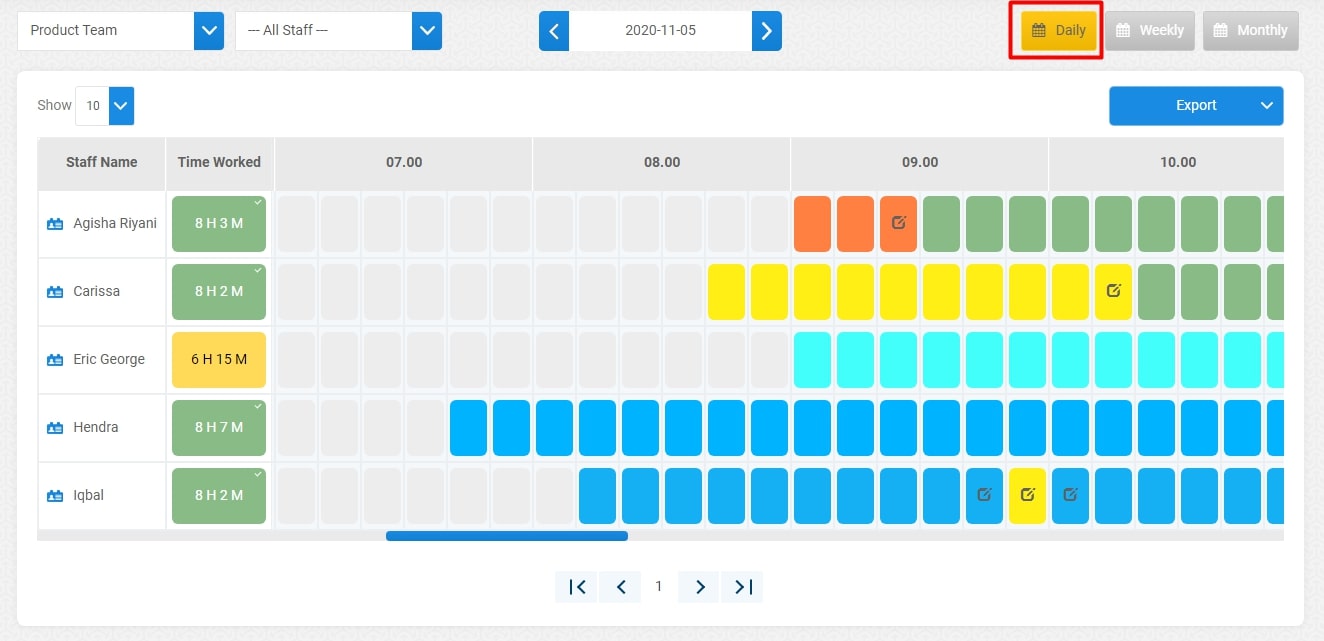
Daily
This feature allows the admin to see the amount of hours each employee has put in per day. On this page there are columns displaying staff names, working periods, and dates per day.
- Staff Name: This column displays the names of staff members who have activated Dokodemo-Kerja.
- Time Worked: The number of hours worked per day.
- Date: This displays the total number of hours worked for up to 1 day.
- : Moves the page to the previous day.

- : Moves the page to the following day.

-
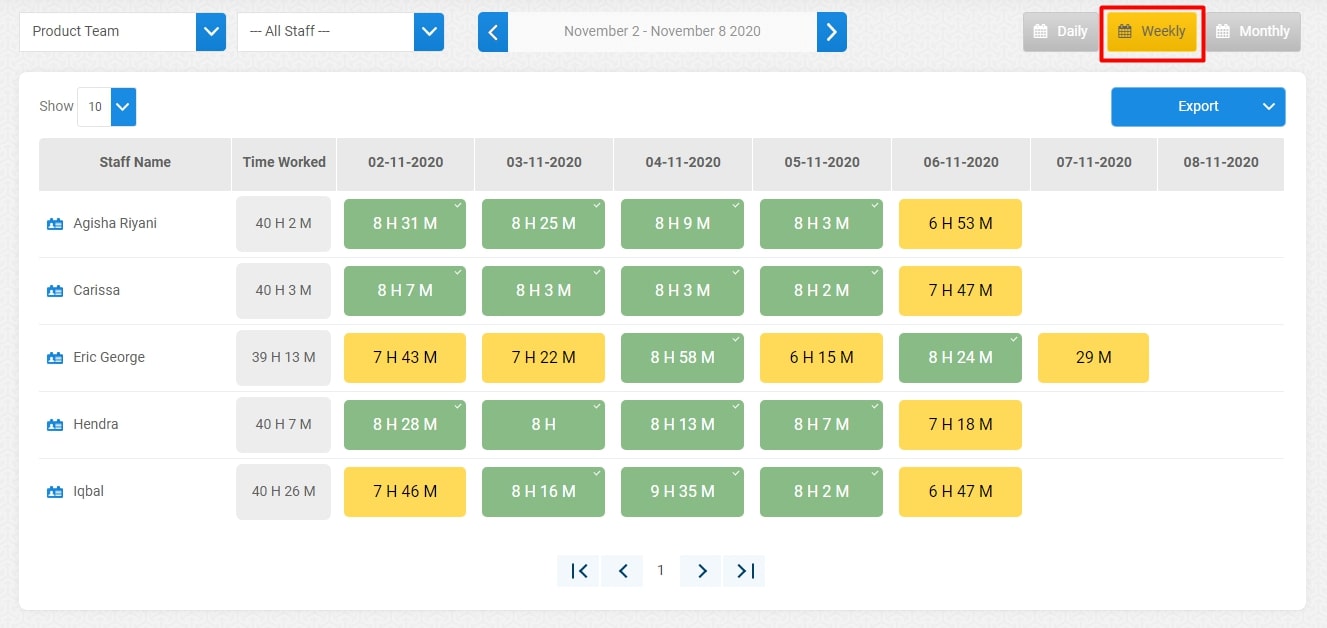
Weekly
The page displays employee working hours for 7 days / 1 week, enabling the admin to see the weekly time tracking data for each employee. On this page there are columns for staff names, working times, and dates for up to 1 week.
- Staff Name: This column contains the names of staff members who have activated Dokodemo-Kerja.
- Time Worked: Total working hours for 1 week.
- Date: Displays the total hours worked each day for 1 week.
- : To move pages to the previous week.
- : To move pages to the following week.
-
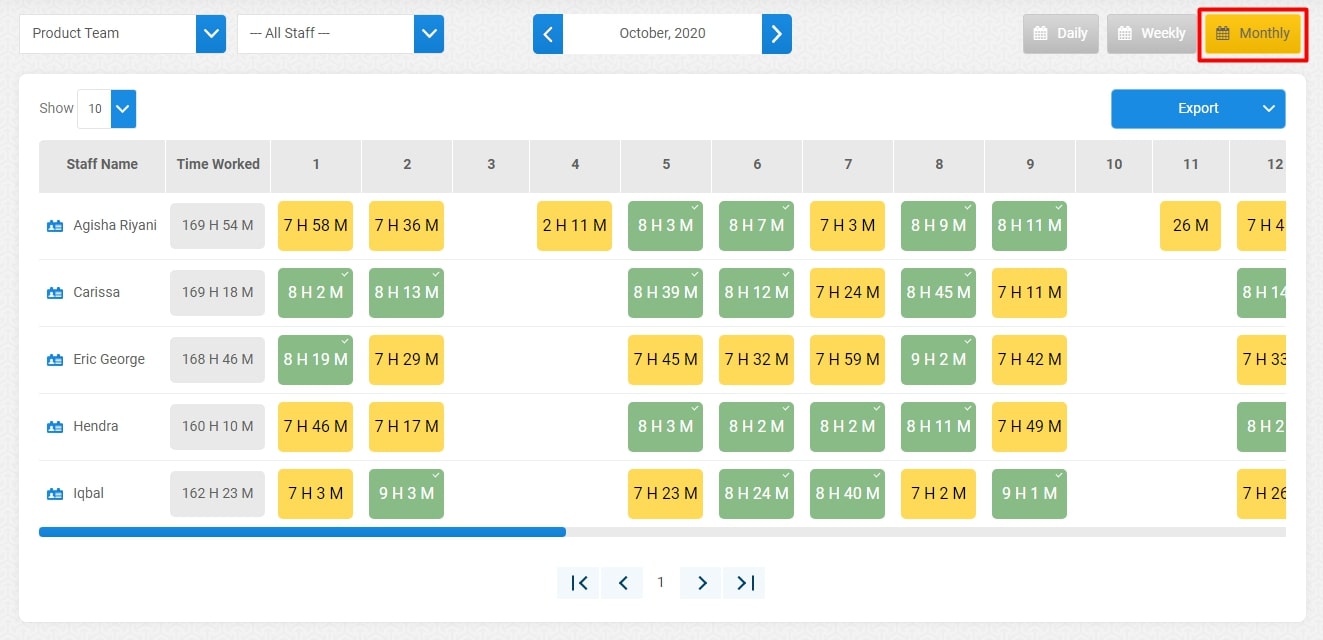
Monthly
The page displays employee working hours for 1 month, enabling the admin to see the employee time tracking data based on each individual month. On this page there are columns for staff names, working times, and dates for 1 month.
- Staff Name: The column that contains the names of staff members who have activated Dokodemo-Kerja.
- Time Worked: Total working hours for 1 month.
- Date: Displays the total hours worked each day for 1 month.
- : To move pages to the previous month.
- : To move pages to the next month.
-
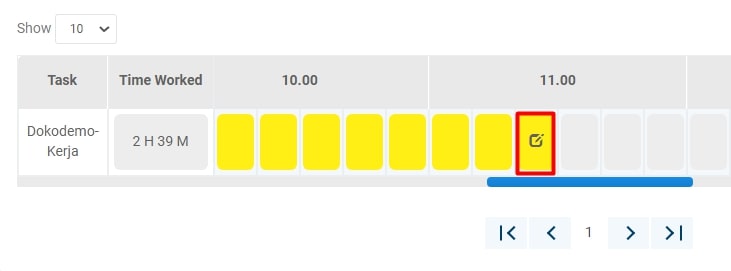
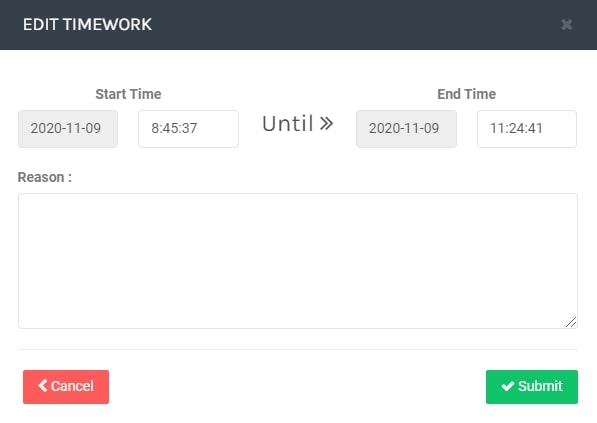
Edit Time Tracking
This feature replaces / changes the time stored in the time tracking menu. This feature consists of three parts: start time, end time, and reason.
- Start time: The time Dokodemo-Kerja had been activated.
- End time: The time Dokodemo-Kerja was stopped.
- Reason: A reason must be written down in the appropriate box, and is required to be able to edit the time.
-
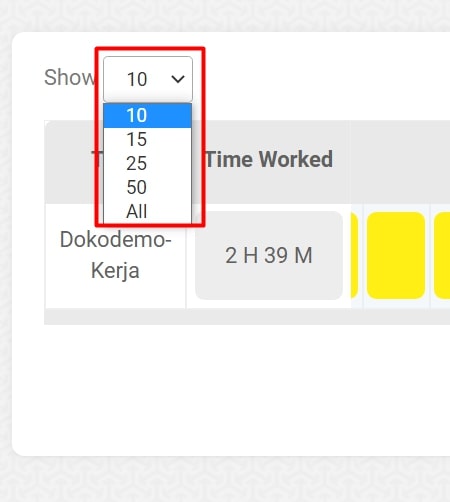
Show Data
This feature comprehensively lists employee data. Admin can choose to display 10, 15, 25, 50, or all employee data.
-
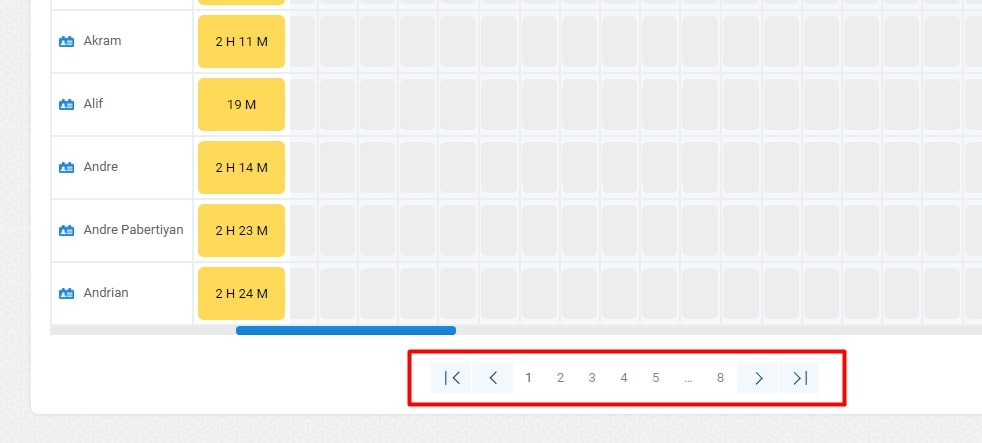
Pagination
This feature is used to shift to the next page. When clicked, the system will display the appropriate page require.
-
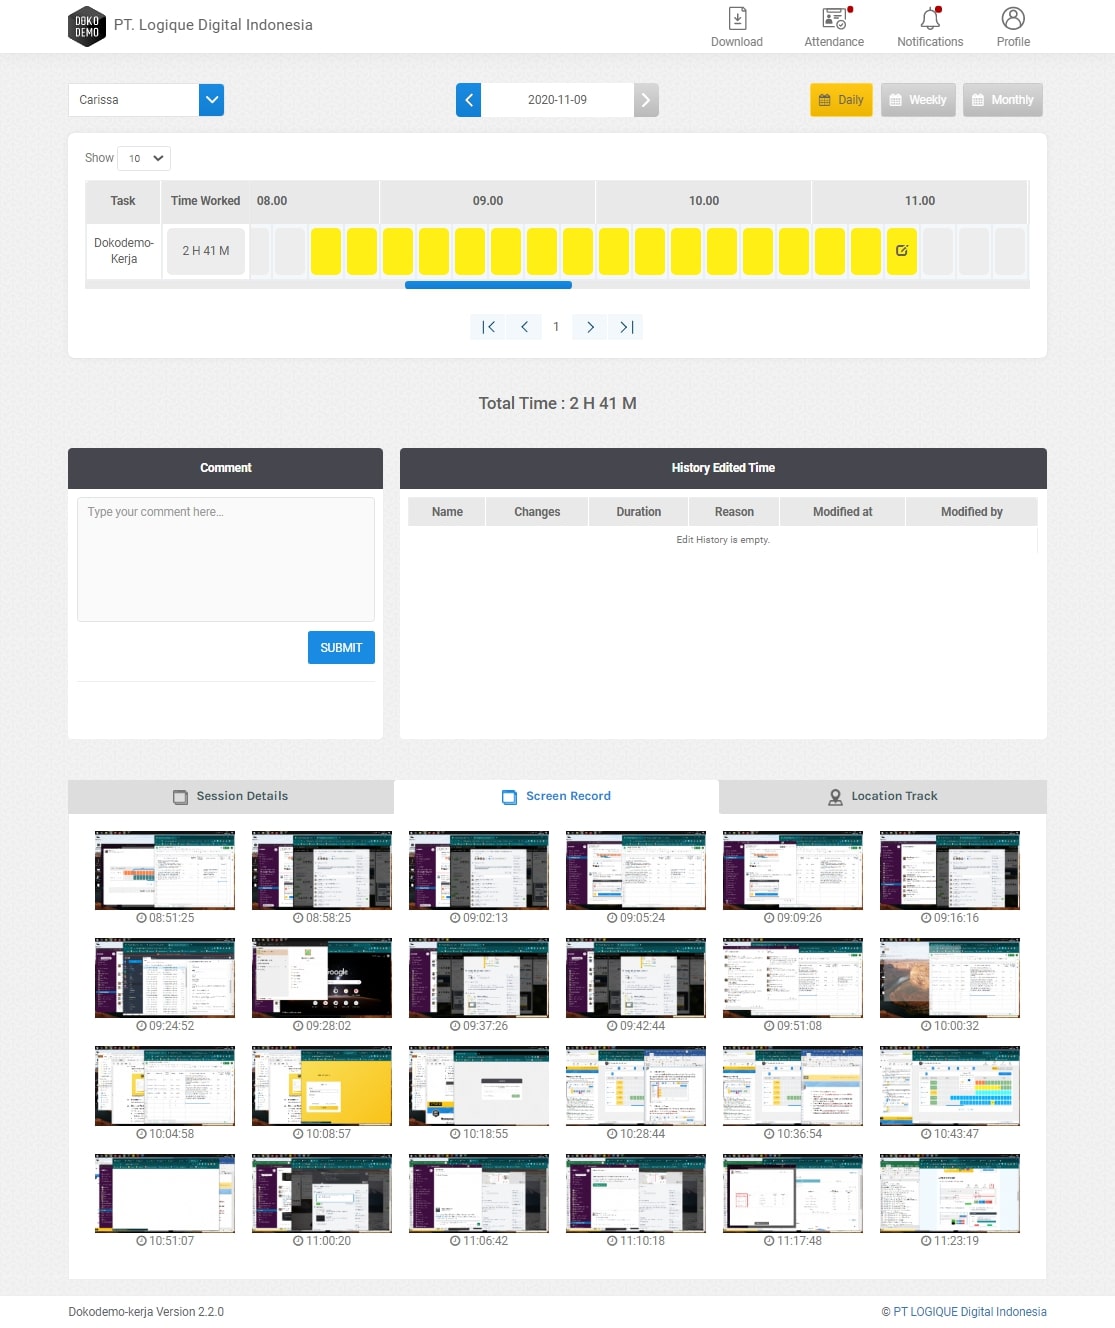
Staff Detail
This feature displays the time tracking details and screenshots of all members of staff. On this page the admin can see the total range of work hours concerning each employee, submit comments to staff members, and can see the screenshots taken from every employees' computer screens during certain times. This feature also displays the time tracking editing history of each employee.
-
Notification
This feature is used to see notifications submitted to the user, such as user addition, inactivity or duplicated screenshots, (Gambar 2.12), status changes, etc.
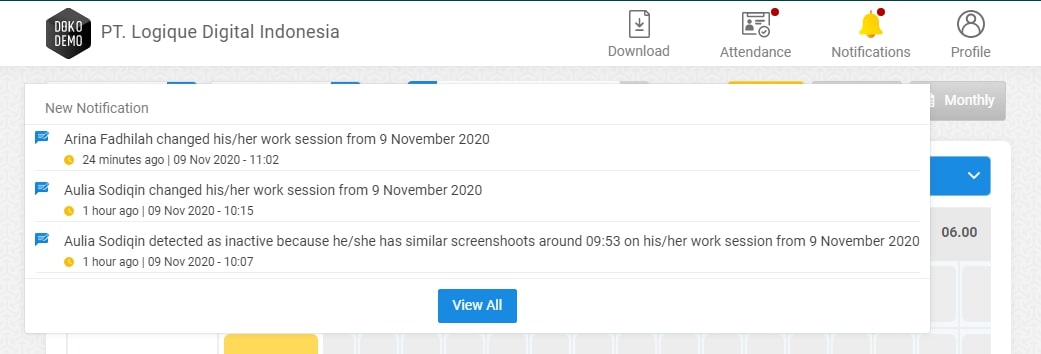
The “View All” button will lead users to a new page that displays the notification history which has been categorised. The ‘Mark as read’ text can be clicked to remove the notification.
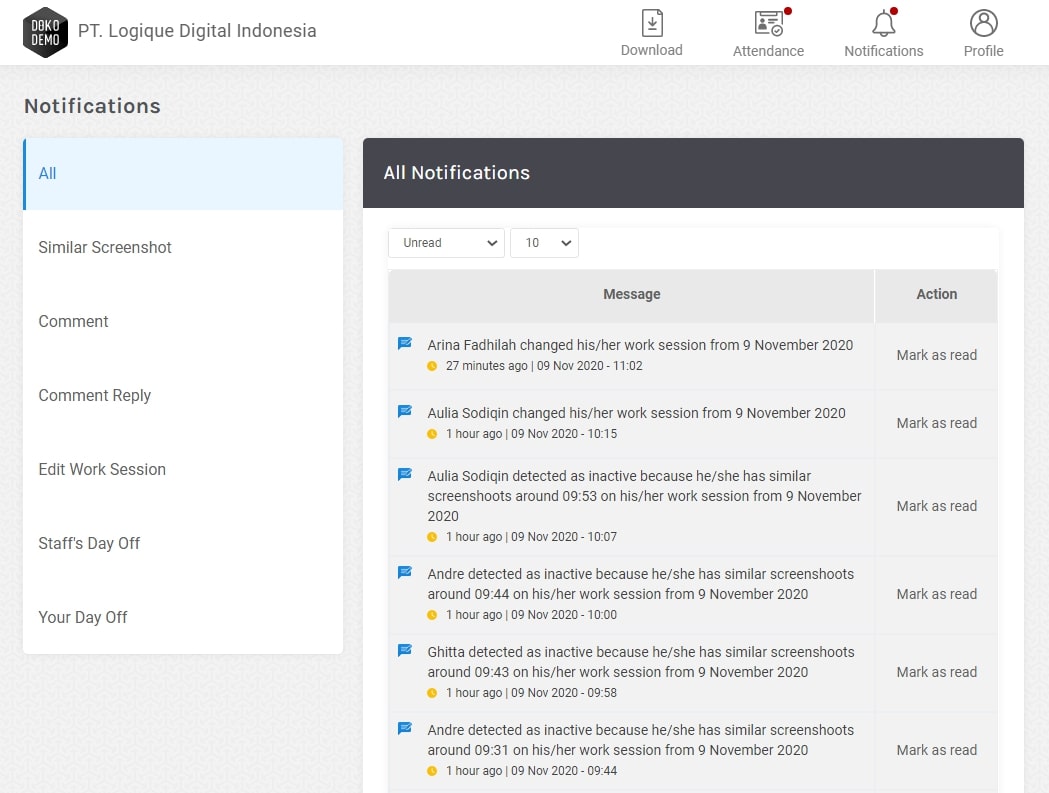
- All: To view all notification history
- Similar Screenshot: Shows staffs with idle screens.
- Comment: Shows the comments made by staffs in their work details page
- Comment Reply: Shows the reply to comments made by staff in their work details page
- Edit Work Session: Shows the names of staffs who change/edit their work hours
- Staff’s Day Off: Shows the staffs who request for a day off
- Your Day Off: Shows the status of our own day off request


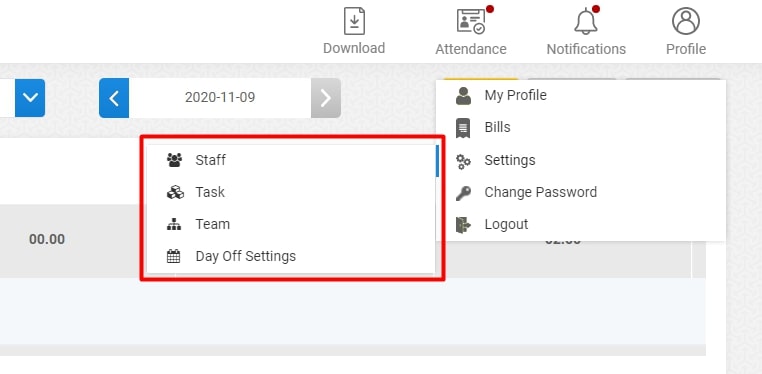
Profile
The profile menu is located on the top right of the Dokodemo-Kerja website. This menu consists of several features described below.
- My profile: This page contains a description of the user's profile.
- Billing: This page is used to view the subscription history and the transactions made through the website.
- Settings: This page is used to configure the Staff, Task, Team, and the Attendance section of the website.
- Change Password: This page is used to change a user's password details.
- Logout: This feature is used to exit the Dokodemo-Kerja website.

-
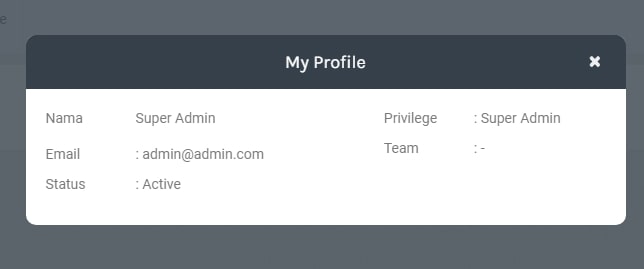
My Profile
This page contains a brief description of a user’s profile.
-
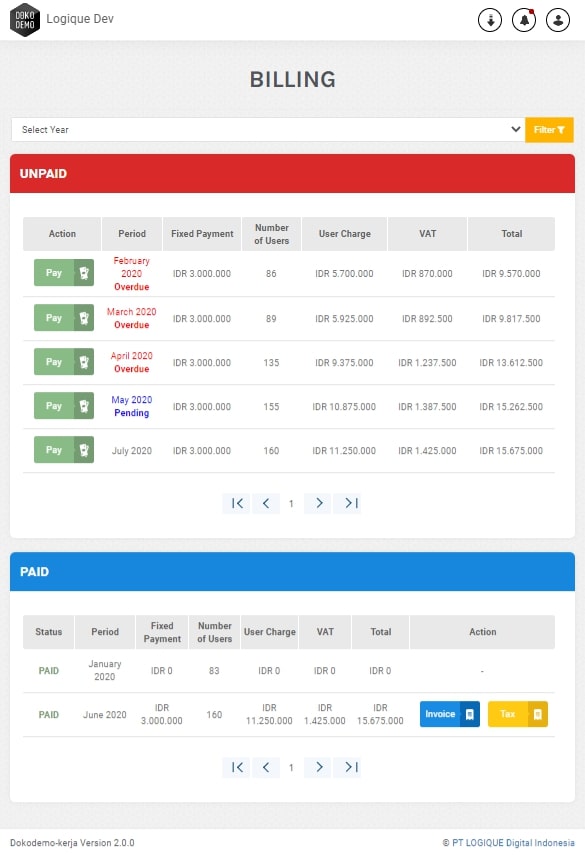
Bills
This page is used to view the subscription and transaction histories which have/have not been completed. This page can also be used to upload payment proof and to view the Invoice and Tax files of a transaction.
- Select Year: This filter can be used to view all the transactions which happened in the span of the selected year.
- UNPAID: This table displays paid, unpaid, pending, and overdue bills.
- PAID: This table displays bills which have been paid and confirmed.
- Invoice & Tax: These buttons will only appear after payments have been confirmed. The files will always be saved in the system, and can be downloaded whenever. If there are no buttons, it means that the payment is free.
-
Settings
This page is used to navigate to the Staff, Task, Team, and Day Off Settings. The usage detail of those pages can be viewed in the next chapter.
-
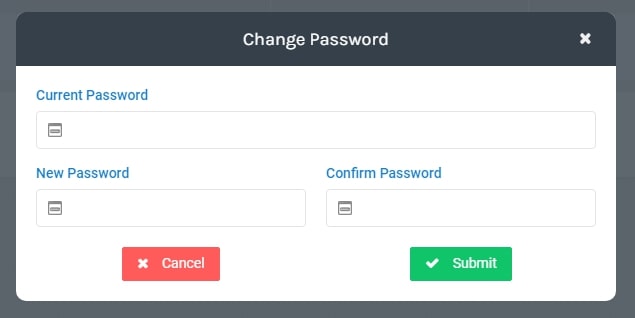
Change Password
This page is used to change user passwords. Input the old password, the new password, and then confirm the change.
-
Logout
This feature is used to exit Dokodemo-Kerja.


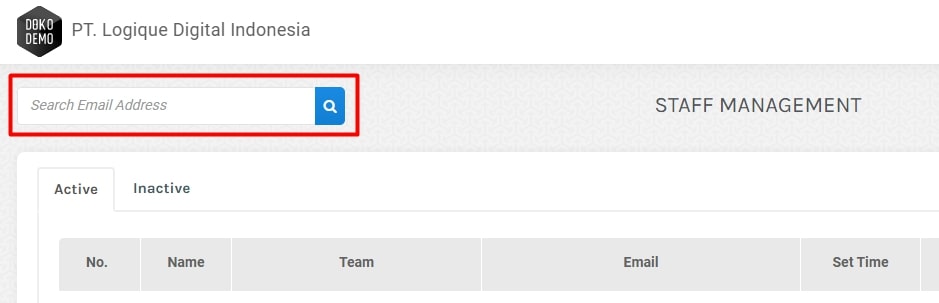
Settings – Staff
The staff page contains information about registered staff members using Dokodemo-Kerja. This page clarifies several features described below.
- Add Staff: This feature allows you to add new staff data.
- Name: Contains the names of registered staff members.
- Team: Contains team staff information.
- Email: Contains the e-mail addresses of staff members using Dokodemo-Kerja.
- Set time: Contains the set times of every staff member.
- Status: Displays information regarding the active/inactive status of every employee.
- Action: Contains an edit button that changes staff data, a password reset button that changes user passwords, an active button to enable/disable staff members, and a delete button to remove staff.
- Filter by: A search feature that locates the word typed into it, based on user email.
- Active/Inactive: These tabs separate the active staff account from the inactive ones.

-
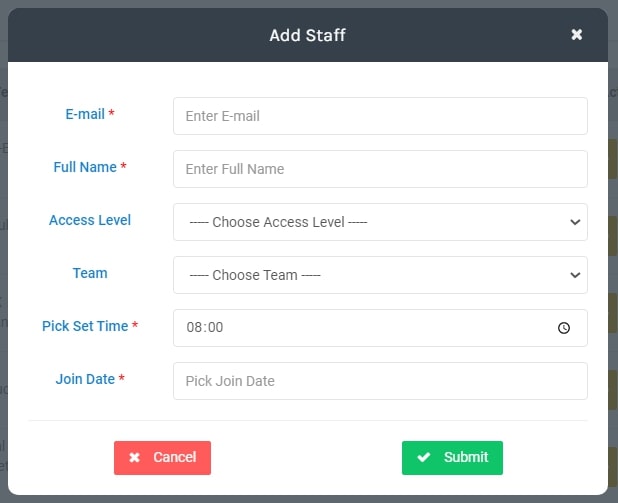
Add Staff
This feature is used to add a new user in Dokodemo-Kerja. These are the fields that need to be filled; email, full name, access level, team, set time (work starting time), and join date (when the employee start working).
Access Level are separated into 4:
- Super Admin: Has the authority to manage Billing, Staff, Task, Team, and view employee’s work hours and screenshots.
- Admin: Has the authority to manage Staff, Task, Team, and view employee’s work hours and screenshots.
- Team Leader: Has the privilege to view the work hours and screenshots of employees within their Team.
- Staff: Are only able to access their own work hours and screenshot records.
-
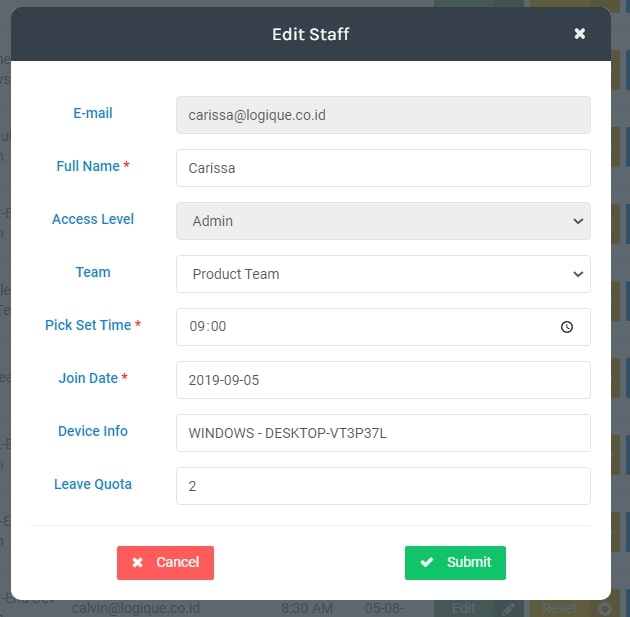
Edit Staff
This feature changes registered staff information, and contains several fields, such as email, full name, access level, team, set time selection, join date, device info, and their leave quota.
-
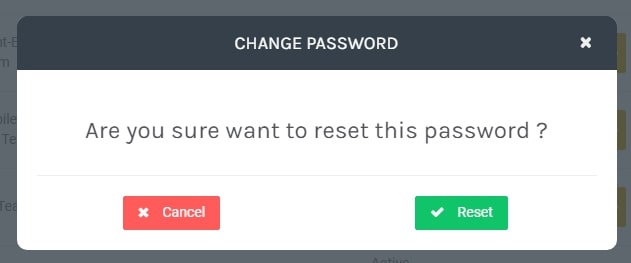
Reset Password
This feature changes the user’s password. The new password is then sent to the staff’s email address.
-
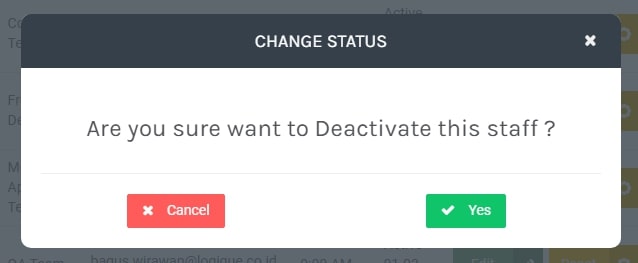
Change Status
This feature changes a staff member’s status to active or inactive.
-
Filter By or Search Data
This filter is used to search for and find the email addresses of staff members.
-
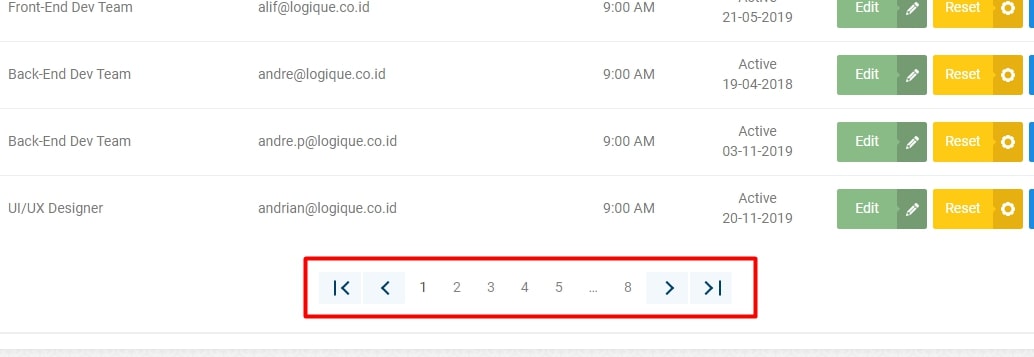
Pagination
This feature switches to the next page, or the previous page.


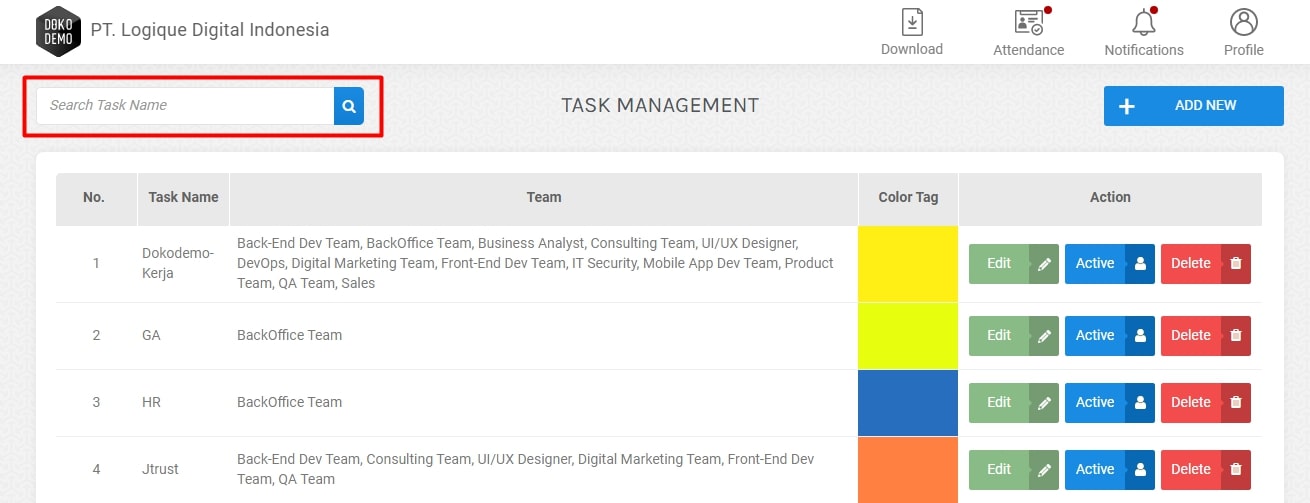
Settings – Task
The project page contains information that is available on Dokodemo-Kerja, and is comprised of several features described below.
- Add New: The button to add new tasks.
- Task Name: Contains the name of the registered task.
- Team Name: Contains the name of the team member who is registered in regards to the task in question.
- Color Tag: The assigned colour of a task which will show up in the daily hour page.
- Action: Contains a colour tag button to add a desired colour, an edit button to edit a registered task, an active button to activate or deactivate the task, and a delete button remove task.

-
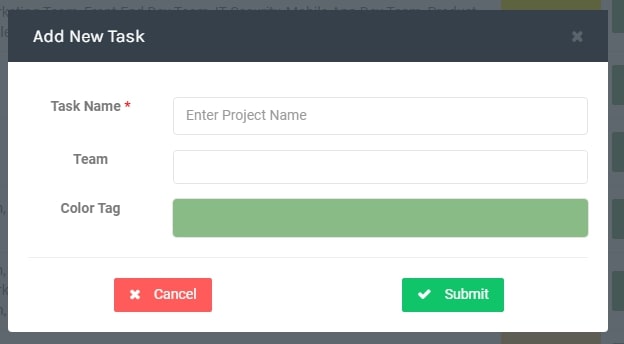
Add New Task
This feature adds new task to Dokodemo-Kerja. Admins need to fill in the task’s name, team, and colour tag to complete the process.
-
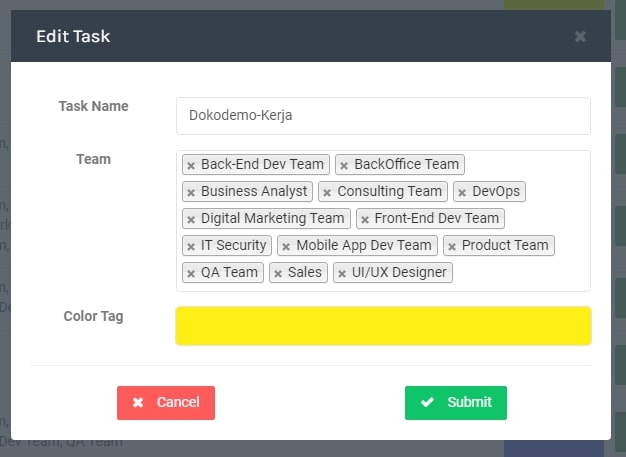
Edit Task
This feature is used to change registered task data. Admins can change a task’s name, team, and colour tags by using this feature.
-
Change Status
This feature changes the status of a task to active or inactive.

-
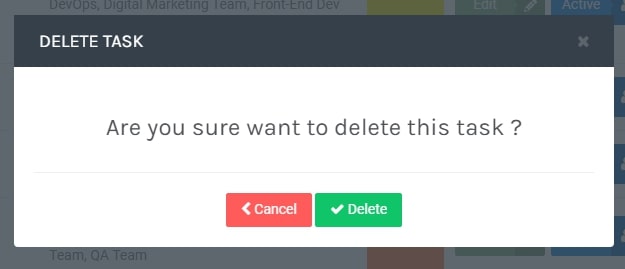
Delete Task
This feature removes the chosen task.
-
Filter By or Search Data
This feature searches and locates names within the task management page.
-
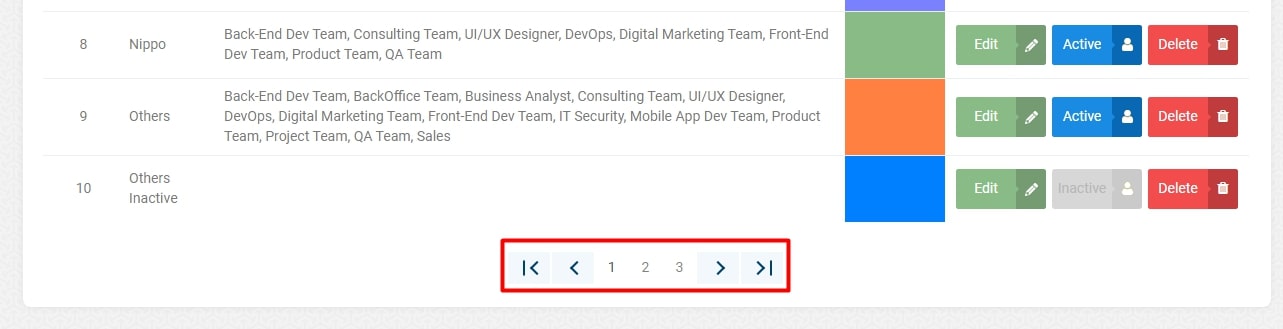
Pagination
This feature is used to switch to the next page or to any specific page that is required.


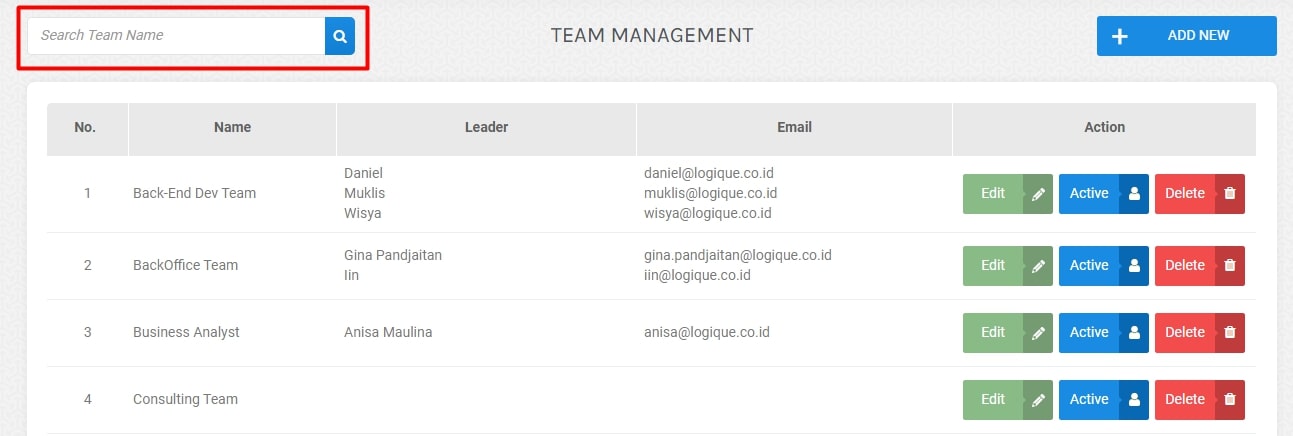
Settings – Team
The team page displays information about the teams included within Dokodemo-Kerja, and contains several features as described below.
- Add New Team: This feature is used to add a New Team.
- Filter by: This feature searches for and locates names.
- Paging: This feature is used to navigate to a certain page.
- Nama: This column displays the name of the team.
- Leader: Displays the name of the leader of a certain team.
- Email: Contains the email of the leader regarding the team concerned.
- Action: The column contains an edit button which changes registered team data, an active button that activates and deactivates the registered team, and the delete button to remove the chosen team.

-
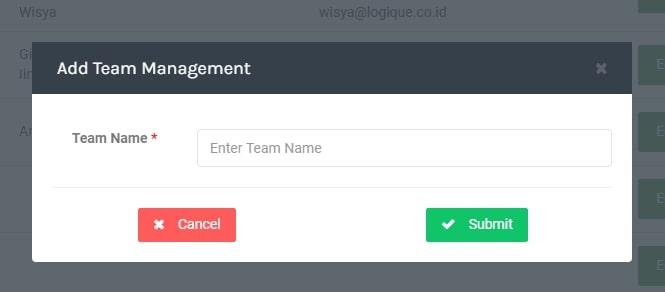
Add Team
This feature adds a new team to Dokodemo-Kerja. Filling in the Team Name is required to use this feature.
-
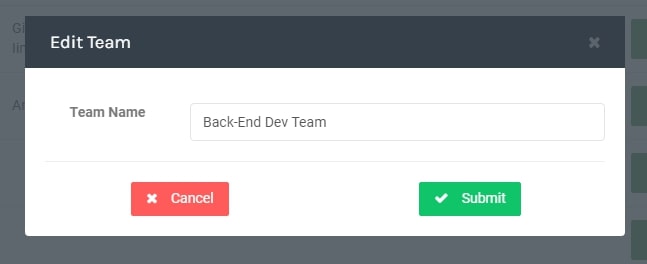
Edit Team
This feature is used to edit information regarding registered team.
-
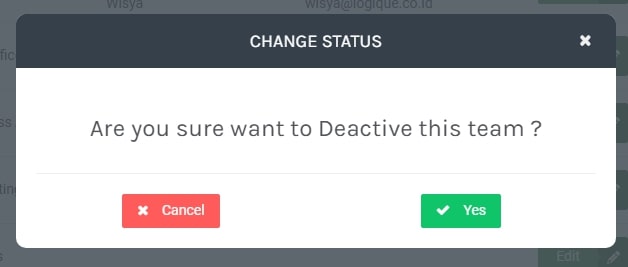
Change Status
This feature changes the status of a team to active or inactive.
-
Filter By or Search Data
This filter searches for and locates names within a specific team.
-
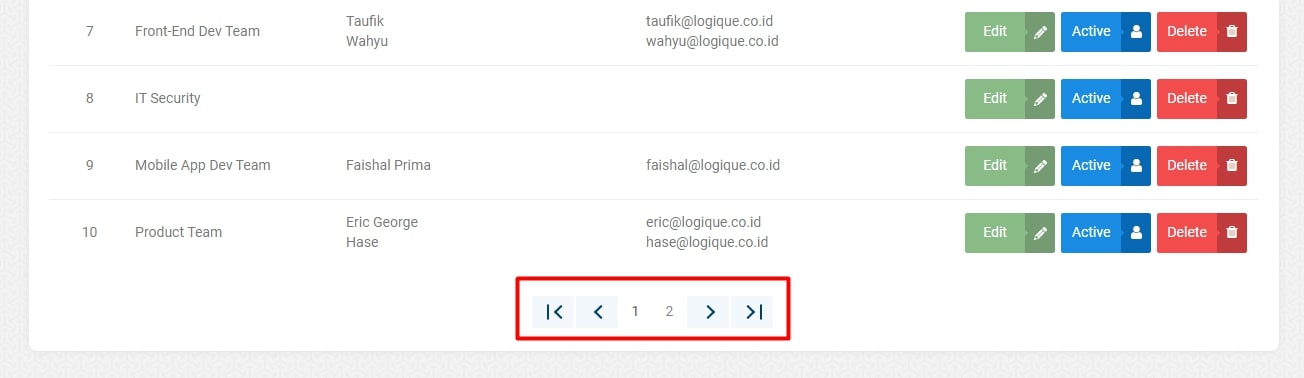
Pagination
This feature switches to the next page or to a specific page required.


Settings – Day Off
The menus listed in this page can be used to adjust the data displayed in the Attendance page.
-
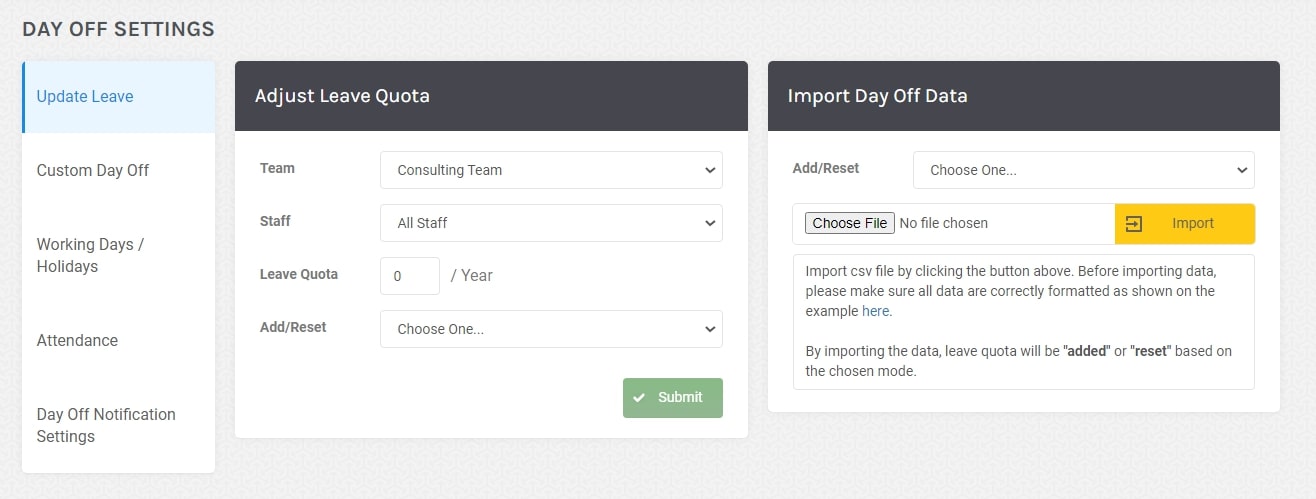
Update Leave
The menu on the left is used to update the leave quota of a chosen team or to update everyone’s leave quota at once. Meanwhile, the one on the right is for updating individual quotas which have been converted into a csv form. The csv form can be downloaded through the link provided in the instruction.
-
Mass Adjust Leave Quota
This feature is used to update the leave quota per team or all at once. The additional leave will be valid for up to 1 year.
- Team: If the update is not limited by team, select All from the dropdown
- Staff: This option will only appear after a Team is picked. Otherwise, it remains hidden.
- Leave Quota: There is no limit to the addition of the leave quota, note that the field can only be filled with numbers. The added leave will be forfeited in the following year.
- Add/Reset: Add is to increase the leave quota, while Reset is to replace the leave quota.
-
Import Day Off Data
This feature is used to update the leave quota based on the uploaded csv file. Download sample / data format from this link.
- Add/Reset: Add is to increase the leave quota, and reset is to replace the leave quota.
- Import: After downloading and completing the leave quota based on the template embedded above, upload the appropriate file by pressing the Choose File button, then press the Import button.
- Add/Reset: Add adalah untuk menambah kuota cuti, dan reset adalah untuk mengganti kuota cuti
- Import: Setelah mengunduh dan melengkapi format kuota cuti yang ada di atas, unggah berkas yang tepat dengan menekan tombol Choose File, lalu tekan tombol Import.
-
-
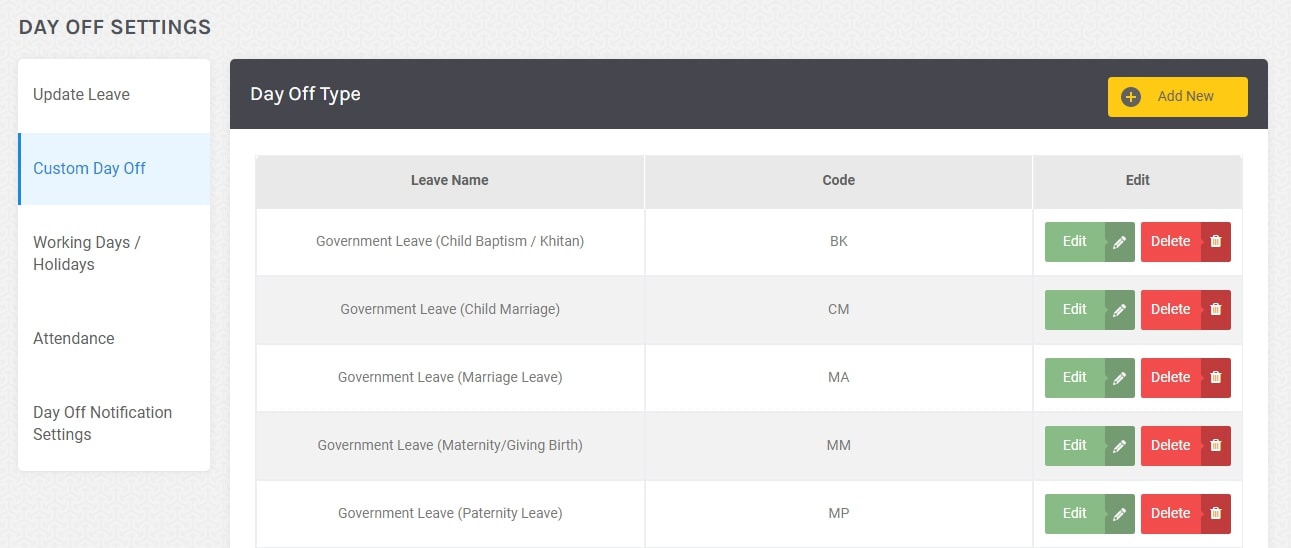
Custom Day Off
This page is used to add types of day off and leave. There are several buttons on this page, namely; Add New, Edit, and Delete.
- Add New: functions to add 1 new type of day off.
- Edit: functions to change the details of registered day off.
- Delete: functions to delete the registered day off.
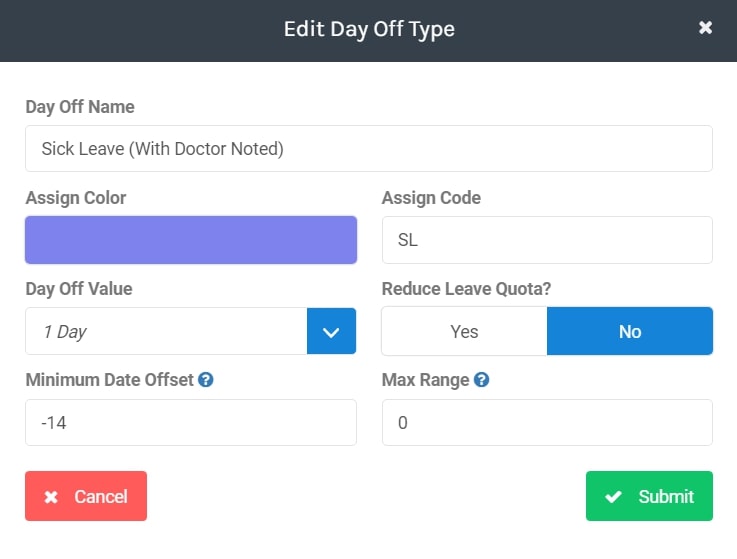
Here are the details of the day off settings.
- Day Off Name: The name of the day off
- Assign Color: The assigned day off colour that will be visible on the Attendance History page
- Assign Code: The day off code that will be visible on the Attendance History page
-
Day Off Value:
- Day: The value of the day off is 1 day
- ½ Day: The value of the day off is half a day
-
Reduce Leave Quota:
- Yes: Day off will reduce the leave quota
- No: Day off will not reduce the leave quota
-
Minimum Date Offset:The minimum day off for submission. The field can be filled with negative numbers, if employees are allowed to request a day off on a past date (backdate). For example:
- 10 days: Staff can only select a day off date 10 days from now
- -14 days: Staff can select a day off date from 14 days ago
-
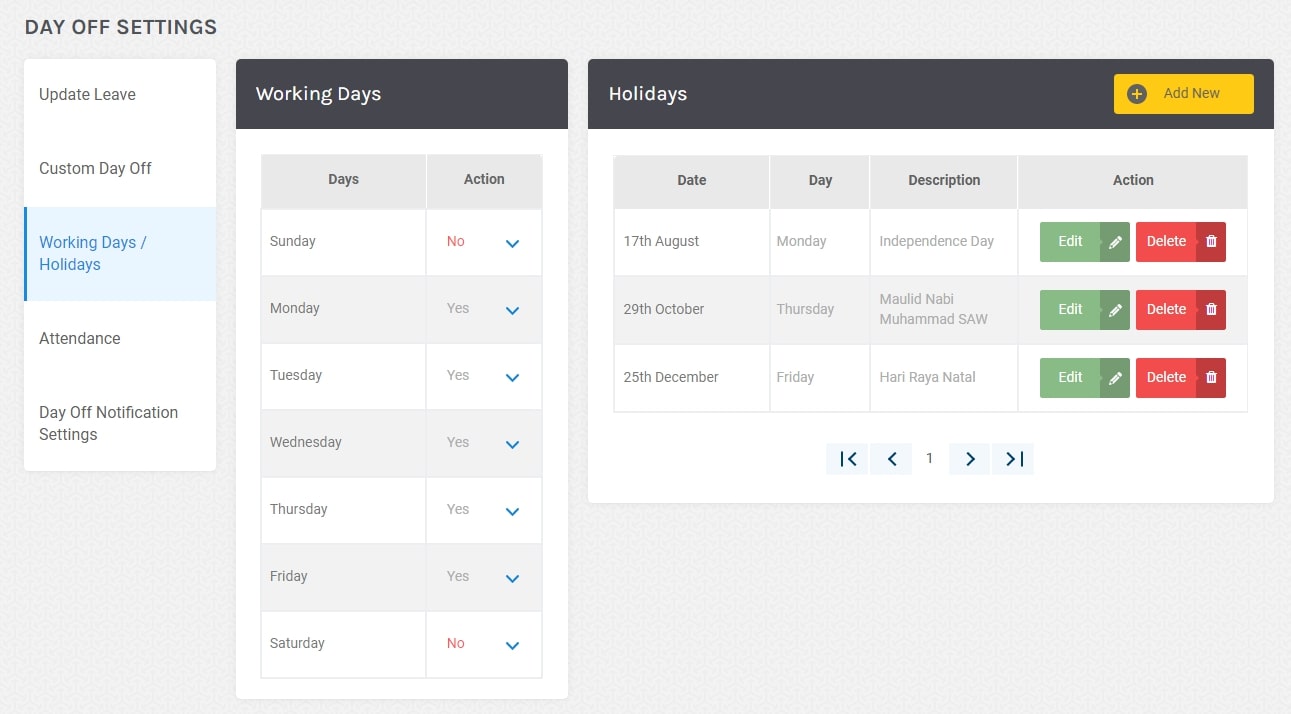
Working Days / Holidays
This page is used to set apart the weekdays from the weekends.
-
Working Days
This menu is used to determine the working days per week. Press the blue arrow under the Action column, select Yes for weekdays, and No for holidays.
-
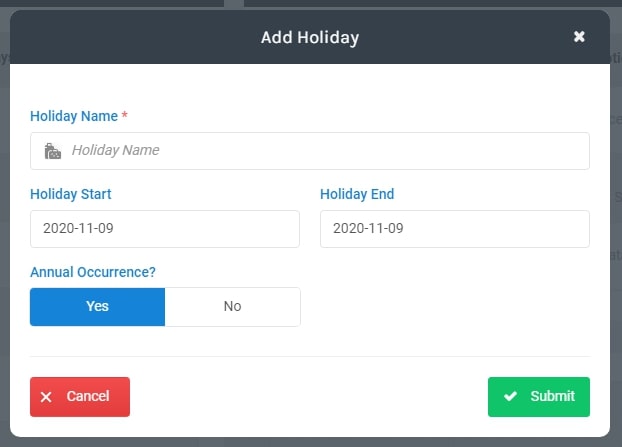
2. Holidays
This menu is used to add, change, and delete specific holidays. Here are the details of the Holidays settings.
- Holiday Name: the name of the vacation
- Holiday Start: the start date of the holiday
- Holiday End: the end date of the holiday (choose the same date if the holiday is only 1 day)
- Annual Occurrence: Does the holiday fall on the same date every year?
-
-
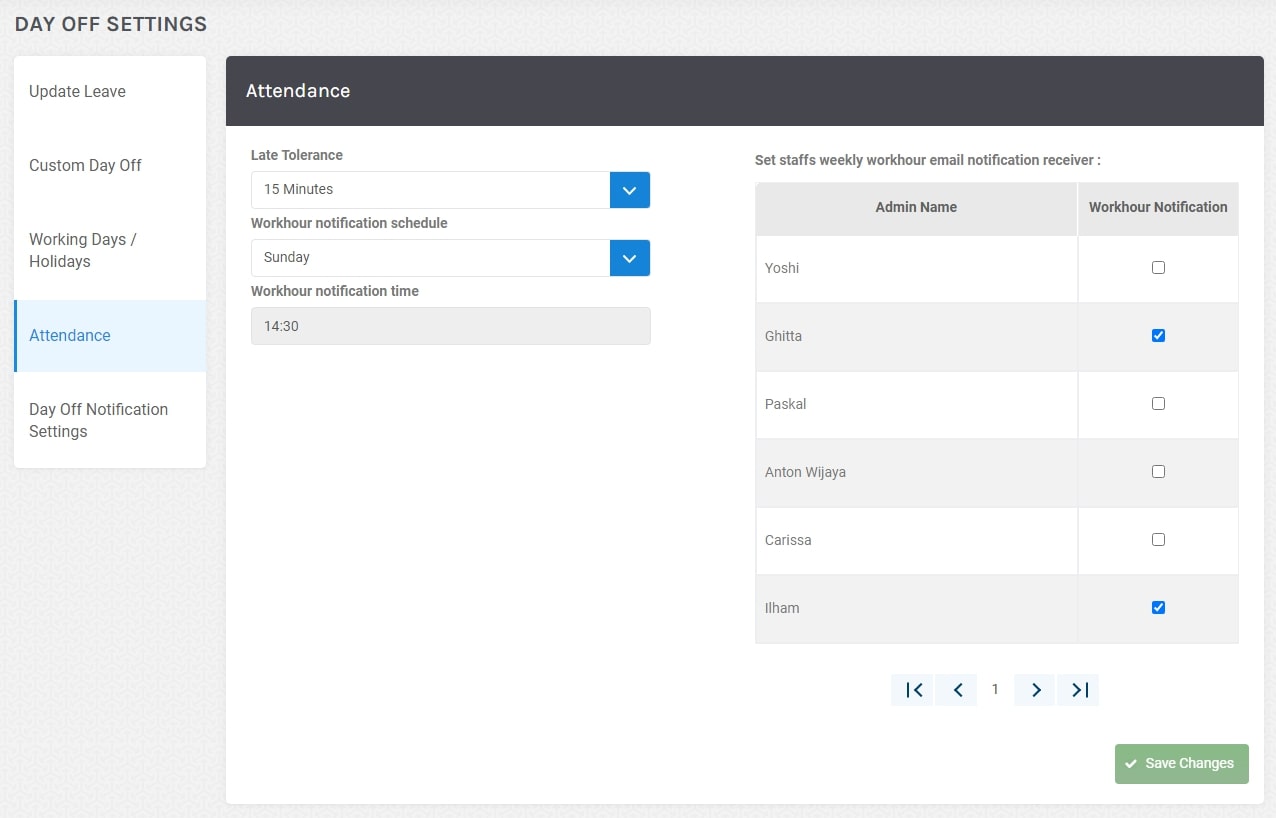
Attendance
This menu is used to determine late tolerance, or tardiness. Hit the Late Tolerance dropdown, choose a time, and click the Save Changes button.
-
Late Tolerance
Click the Late Tolerance dropdown, choose a time, and click the Save Changes button.
For example: If the selected dropdown is 15 minutes, and the employee starts the program 16 minutes exceeding the chosen Starting Time, the staff will be considered 16 minutes late, and not 1 minute.
-
Workhour Notification Schedule
This feature is to choose whether the super admin / admin will receive an email notification containing a list of employee names who have not met the minimum working hours, which is 40 hours.
The dropdown is used to select days, or to not receive any emails at all.
-
Workhour notification time
This feature is used to determine what time the email is sent each week.
-
Set Staff weekly workhour email notification receiver
This table shows a list of admins and super admins who can receive work hour notification emails. Click the checkbox to determine who will receive the email.
-
-
Day Off Notification
This menu is used to determine the super admin / admin who will receive an email notification whenever a staff requests for a day off regardless of the department.
Even though the team leader name is not listed in the table, they will still receive an email, but only when they are selected as the Person Informed on the application form.


Attendance Admin
The Attendance feature can be accessed via the top navigation menu. This feature is divided into 3 pages.

-
Day Off / Leave
The Day off page is divided into 2 sections; My Day Off Request and Day Off Request. All things related to leave and day off management can be done here.
-
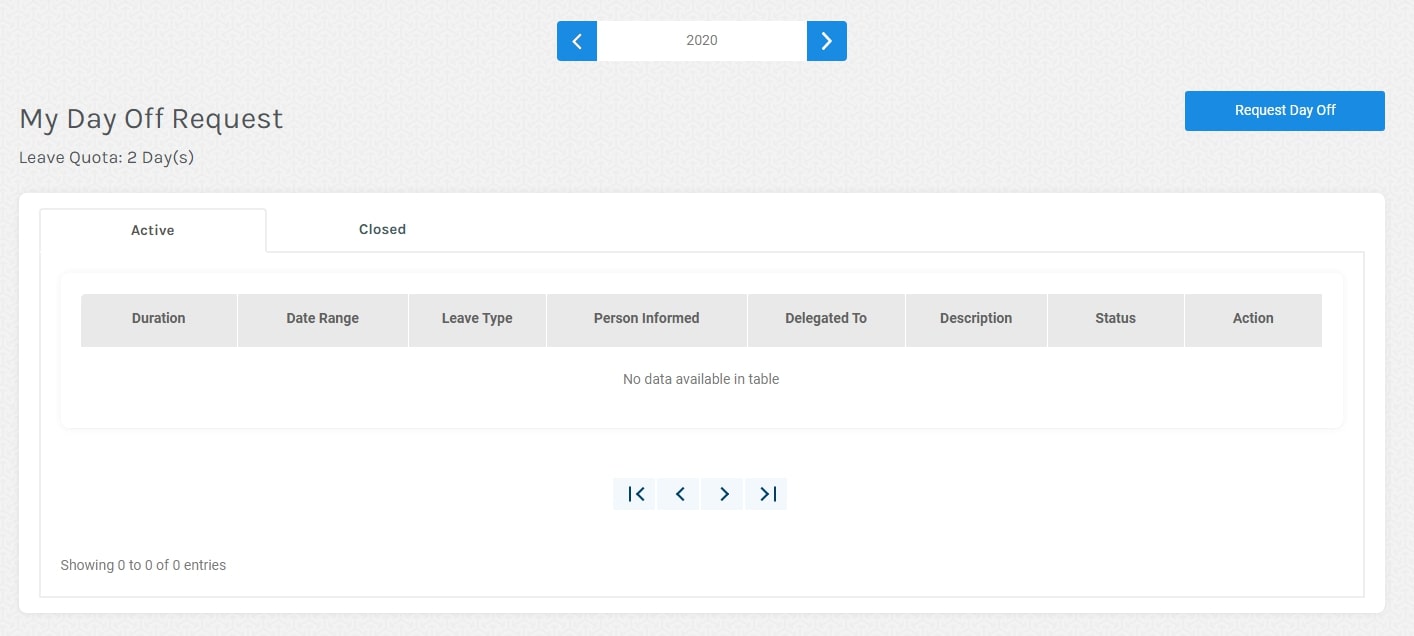
My Day Off Request
The first table is used to manage personal day off applications. This menu consists of 2 tabs; Active and Closed.
- Active Tab stores applications that are still waiting for approval (Pending), and those that have been approved (Approved).
-
Closed Tab stores applications that have been rejected (Rejected) and those that have passed.
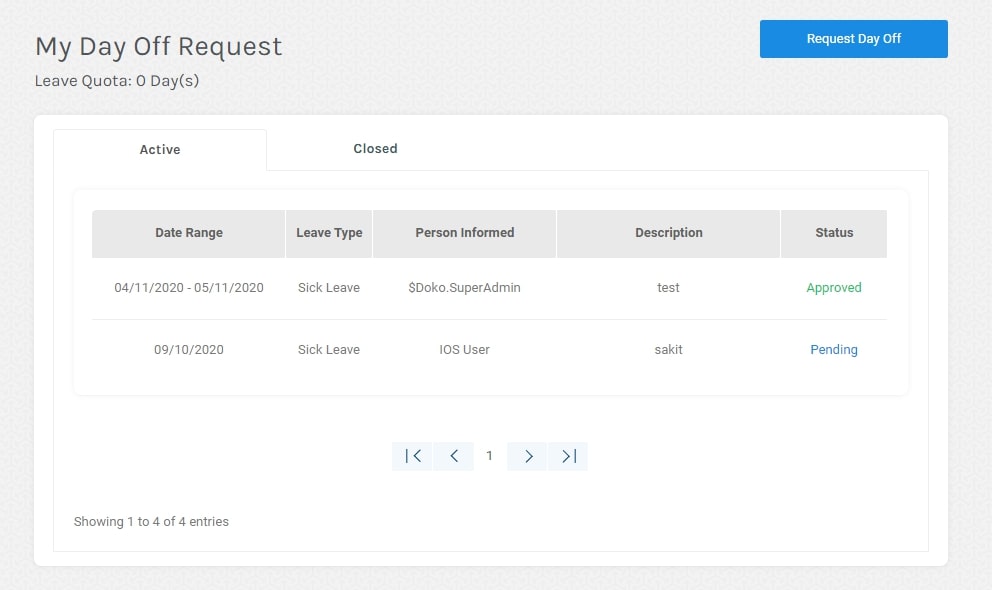
To apply for a day off, press the Request Day Off button. A form will appear.
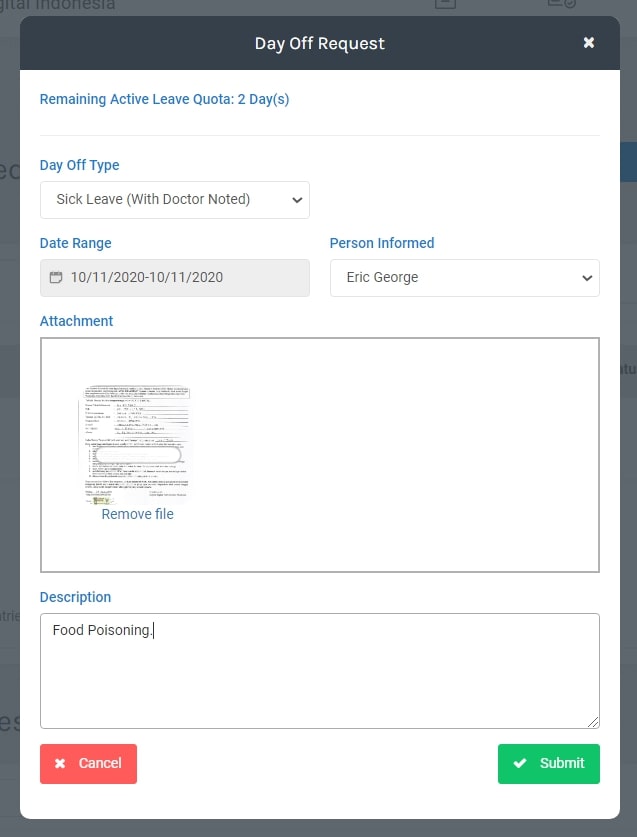
- Remaining Active Leave Quota: Remaining leave quota. If the proposed day off date exceeds the remaining leave quota, provided that the type of day off chosen will reduce the leave quota, the application will be rejected automatically.
- Day Off Type: Options for the type of day off applied by the Admin.
- Date Range: Select the date(s) for the proposed day off. The date selected may be more than one day, but the starting and ending should not fall on a holiday.
- Person Informed: Supervisor/Team Leader who will receive the day off requests on their dashboard.
- Attachment: A feature to attach day off files in pdf or image form. Can be used to attach a doctor's letter or other files.
- Description: A day off explanation column that can be seen by the Team Leader and Admin as a consideration for the requested day off.
-
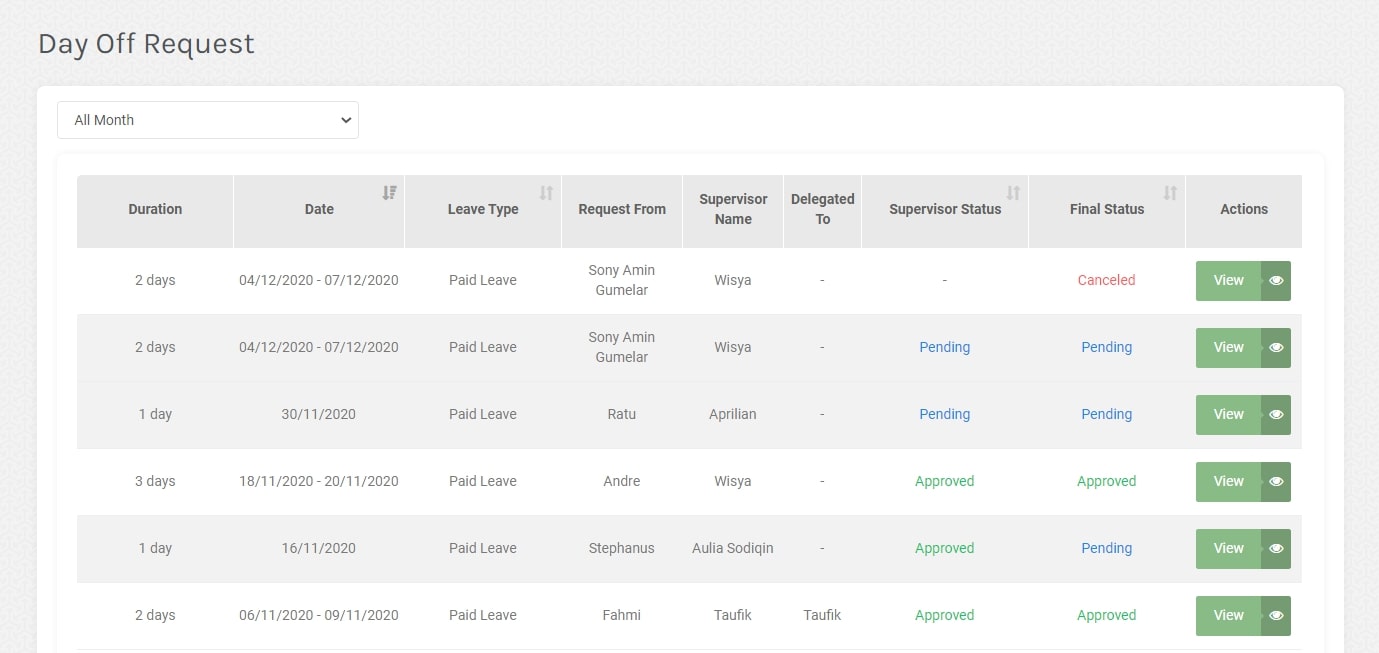
Day Off Request
Day Off Request (Team's Day Off Request for team leaders) in the second table contains requests for day offs from staff. The following is an explanation of the columns which can be seen in Figure below.
- Date: The requested day off date
- Leave Type: The selected day off type
- Request From: Name of the staff requesting day off
- Supervisor Name: Name of the requestor’s supervisor
- Supervisor Status: Team Leader’s decisions regarding the day off application. This status serves as a consideration, and not a determinant
- HR Status: HR or Admin’s decision regarding the day off application. This status determines whether a day off application is accepted or rejected.
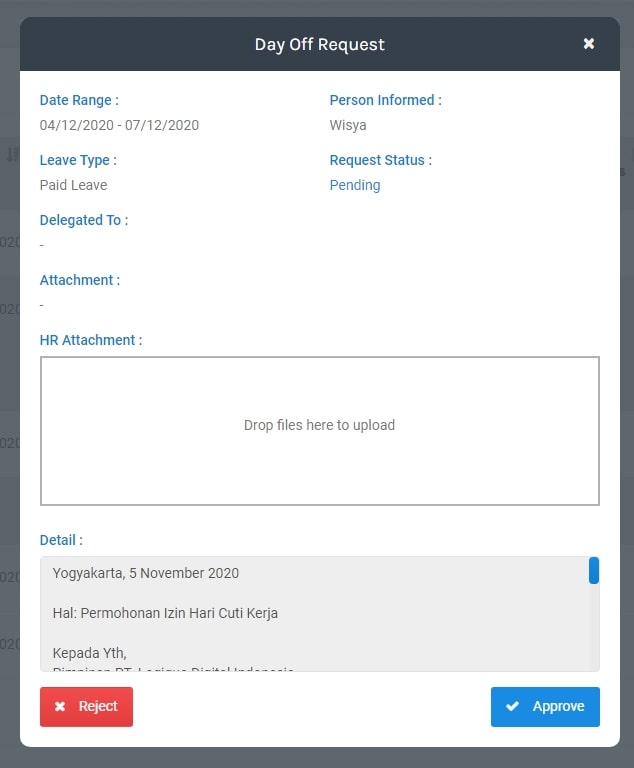
- Action: The View button displays details of a day off request so the HR can accept / reject a day off request.
-
-
Attendance History
The Attendance History page shows employee attendance which contains days off, leave, sickness, or other day offs that have been set up in the settings page.
-
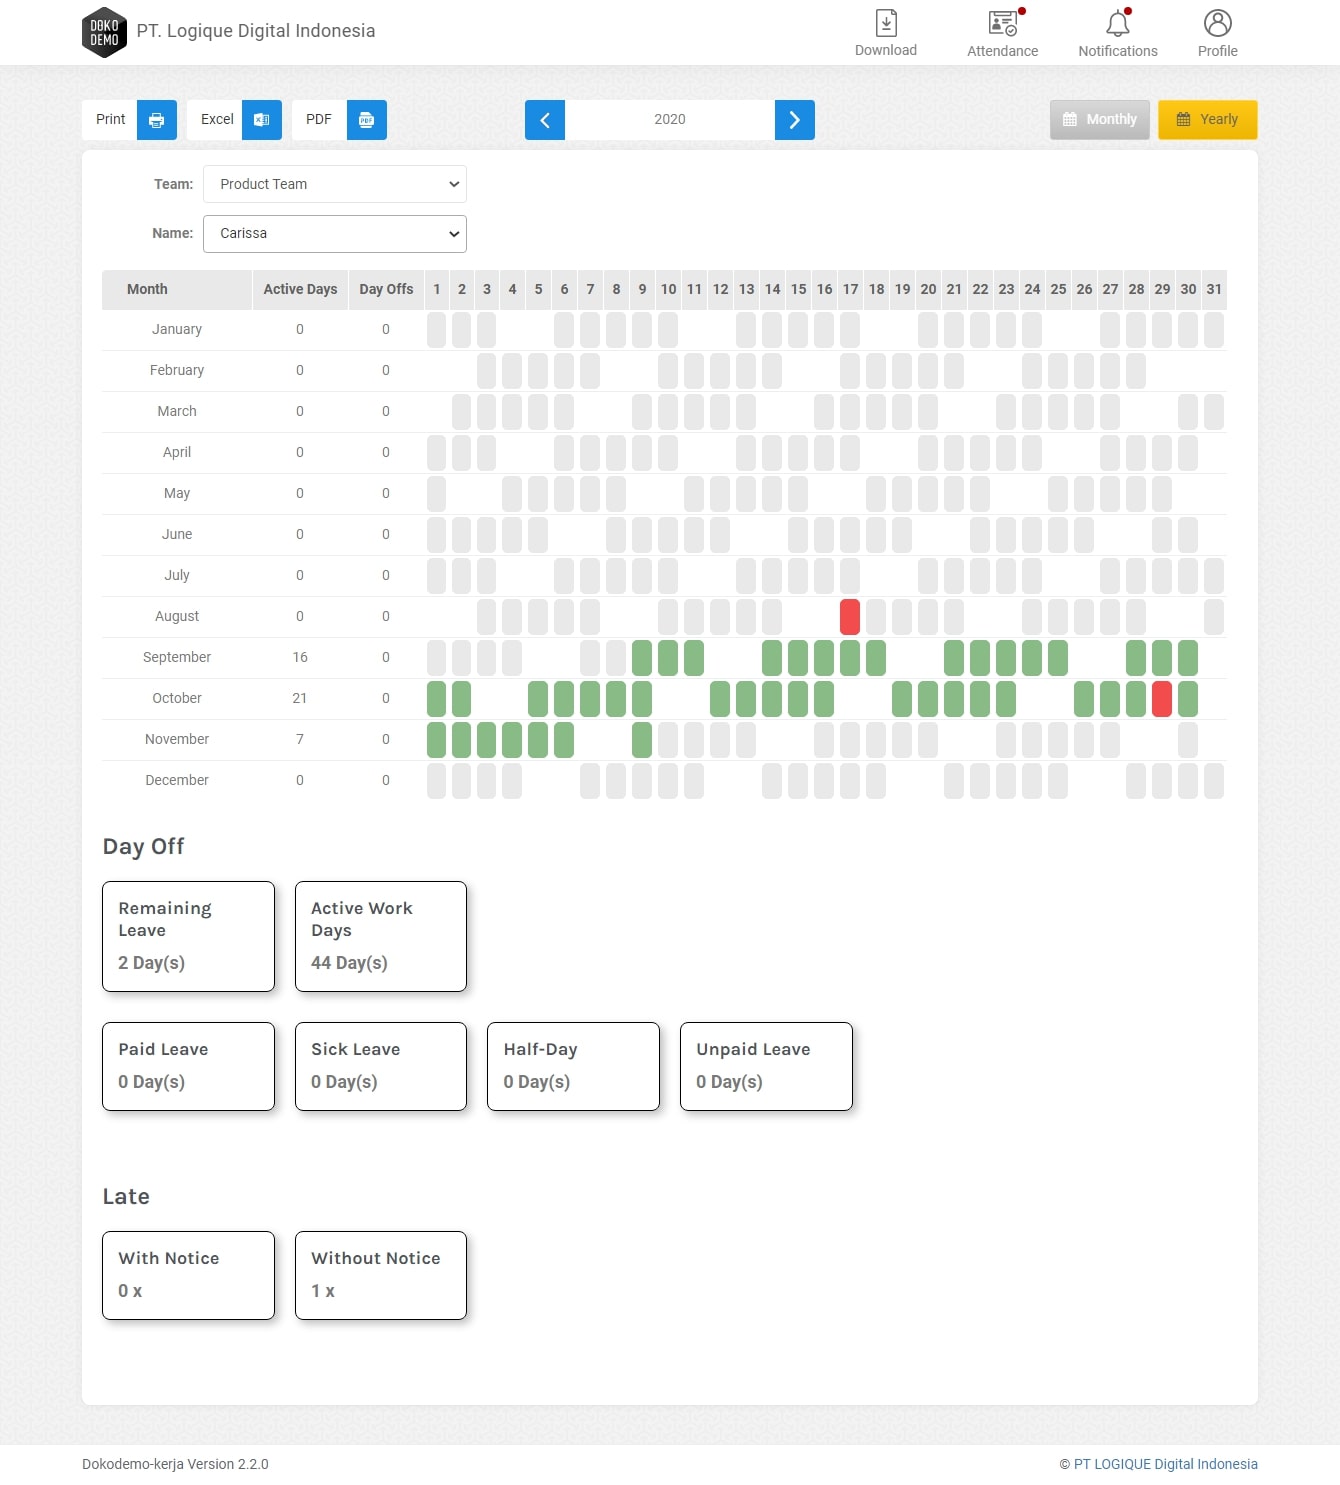
Monthly
Figure below shows employee absences for 1 month. Staff names can be clicked to display the attendance history.
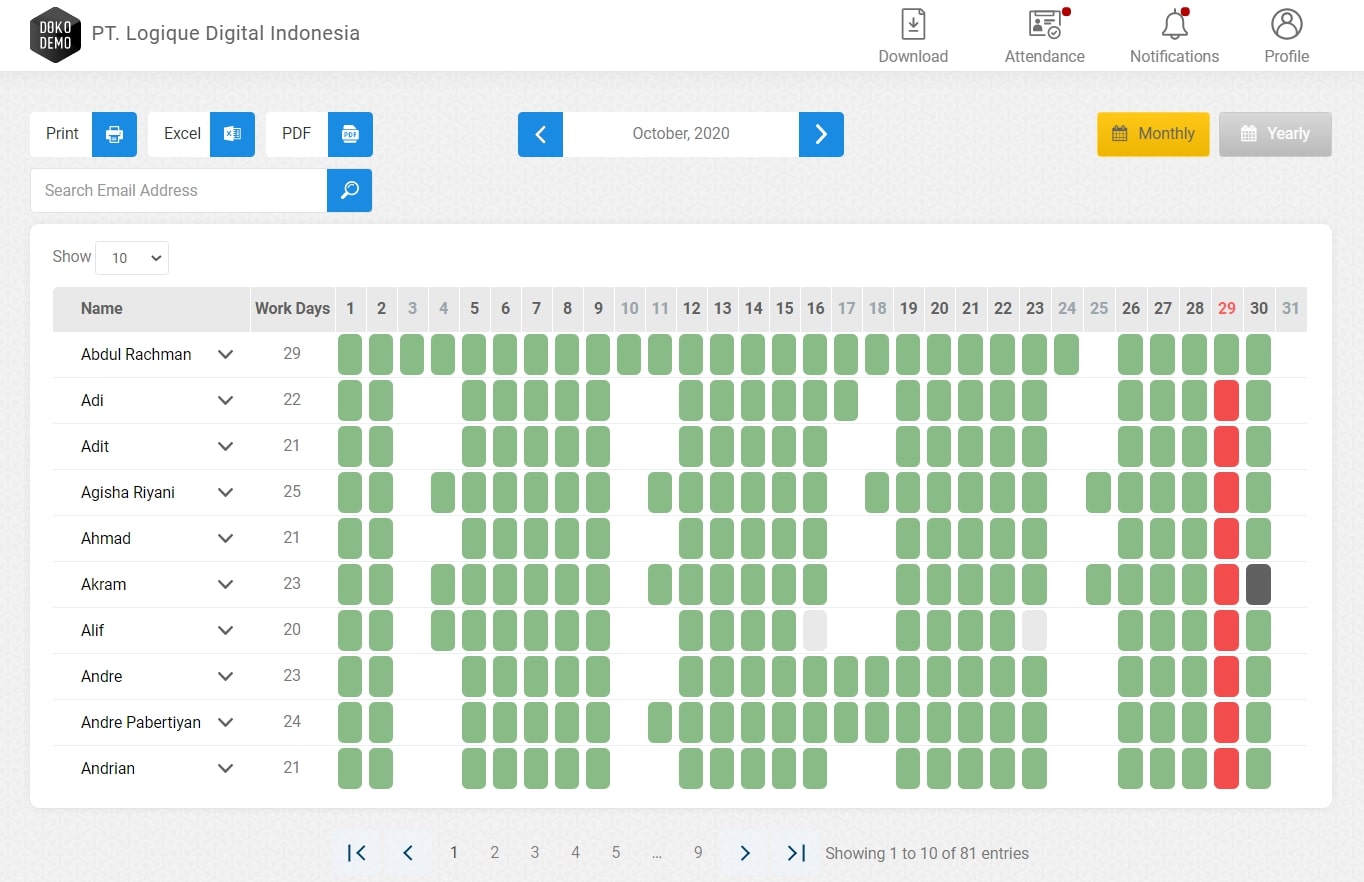
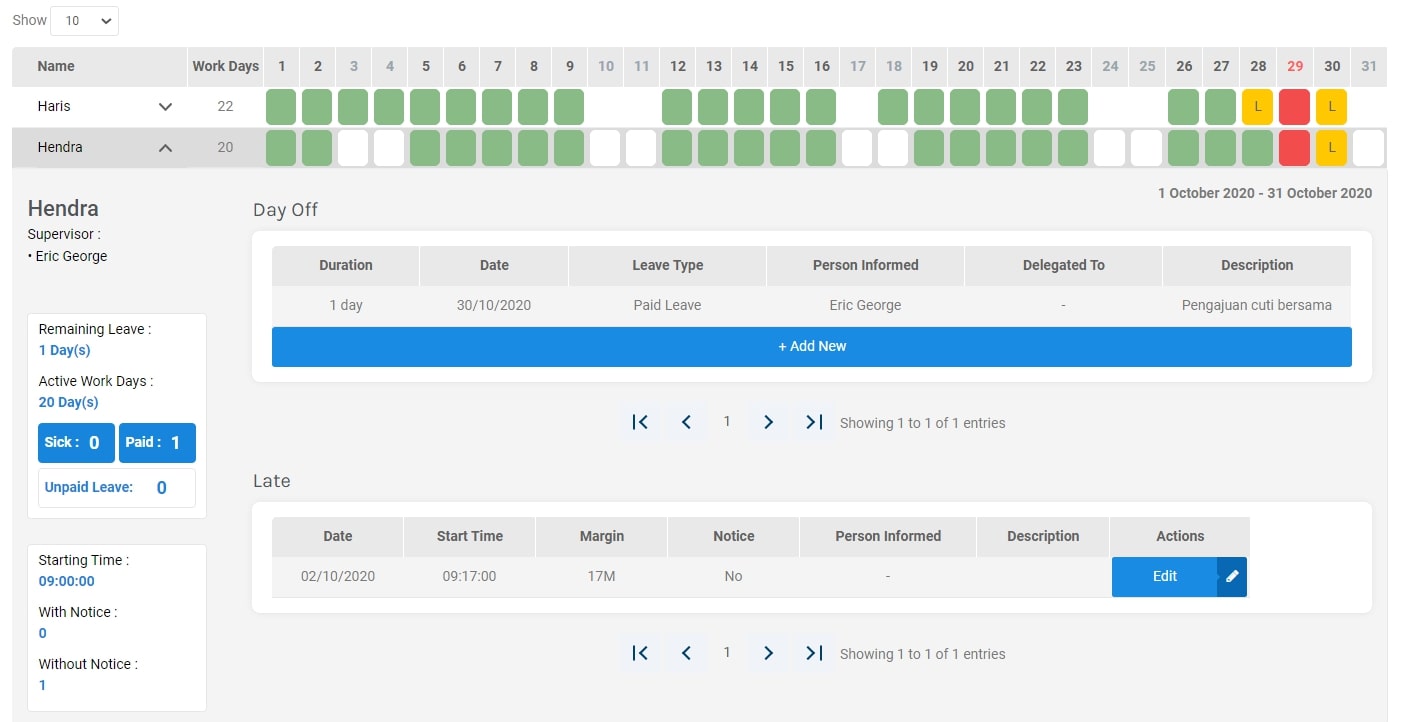
On the left side of the table, you can see the summary of employee attendance which contains the records of leaves and tardiness for up to a month.
There are 2 tables in attendance details. Day off table shows all day offs that have passed, and the Late table indicates on which days the employees are late.
-
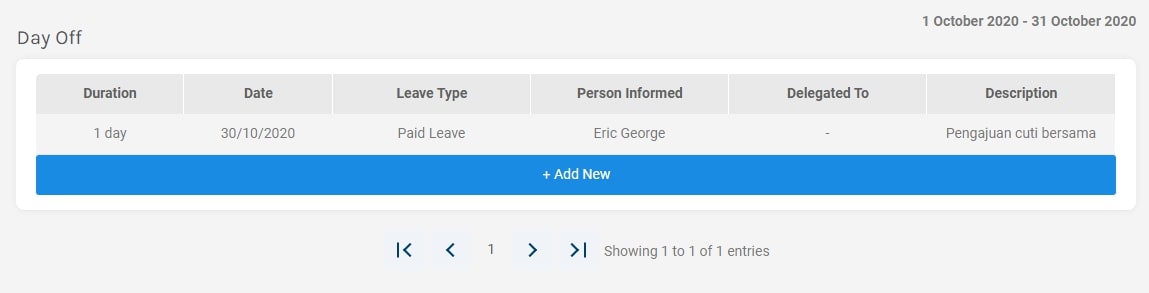
Day Off
The admin can add a day off that is not submitted by the staff by clicking the Add New button. When the Add New button is clicked, a form similar to the Day Off Request will appear (Gambar 8.3).
-
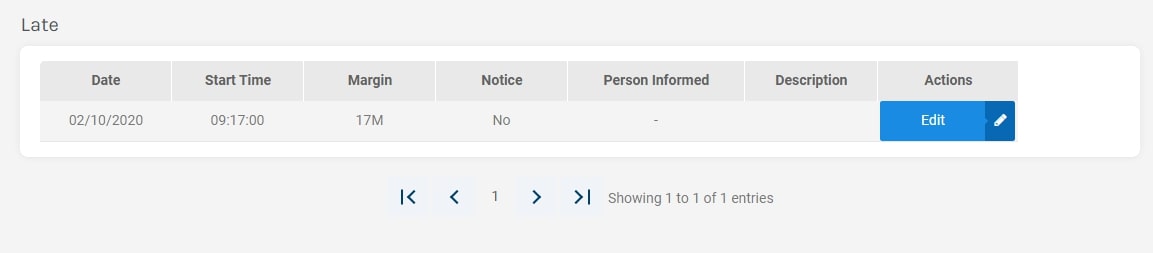
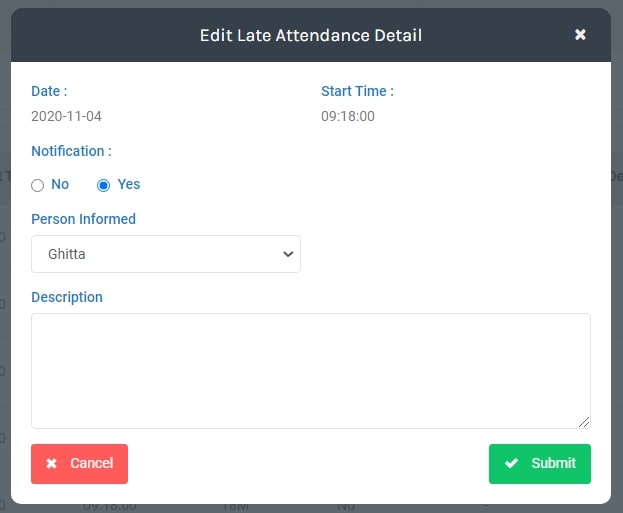
Late
The Late table shows the number of times the employee was late in the span of 1 month. Data will be updated automatically, so there is no Add New button in this table. If the edit button is pressed, a form to change the details of the delay will appear>
-
-
Yearly
The admin must first select the team and staff name to display the employee's absence history. The first table shows the records of attendance, tardiness, day off, leave, and holidays for 1 year.
-
-
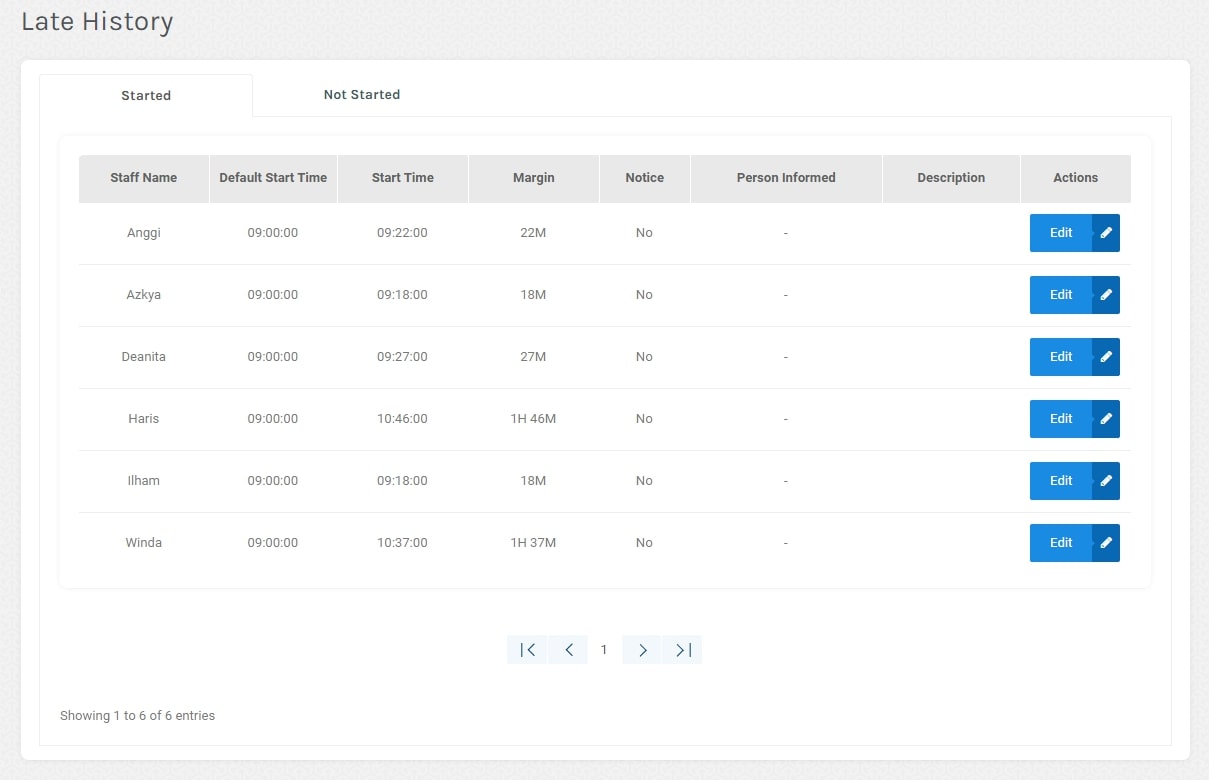
Late
The Late page shows employees who are tardy and who have not started the Dokodemo-Kerja application on that day. Delay details can be edited by HR if necessary. The Late History table is divided into 2.
-
Started
This tab is filled with the names of people who are late but have started the application. Edit button is used to add the reason for the delay..
-
Started
This tab is filled with the names of people who are late, and have not started the application.
-


Desktop App
Dokodemo-Kerja’s desktop app can be downloaded through the navigation bar, as shown on Figure below. The Desktop App is available in 3 platforms; Linux, Mac, and Windows. As for the mobile app, they can be downloaded through Play Store, App Store, or directly from the website.

The Desktop App can only be used by users registered in the Dokodemo-Kerja’s systems. The app consists of several features described below.
-
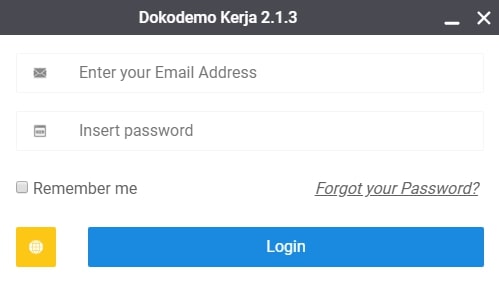
Login
Login by using the correct email address and password. An internet connection is needed to login.
-
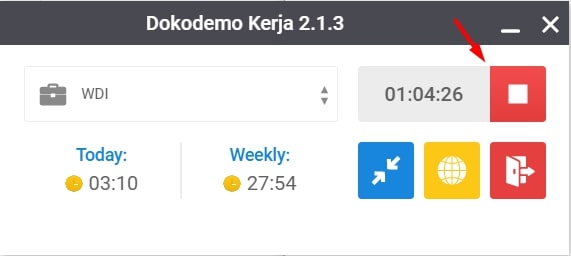
Start / Stop Task
To start the time counter, press the “Play” button.
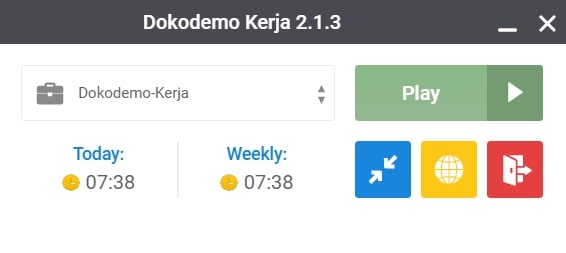
To stop the time counter, press the Stop button.
-
Other Features
- Today: Shows today's accumulative work hours
- Weekly: Shows this week's accumulative work hours
- Blue Button: To minimize the layout
- Yellow Button: To access the main website dashboard
- Red Button: To Logout


Dashboard - Staff
This is the main web dashboard of Dokodemo-Kerja’s staff.
-
Homepage Staff
The page can be used by registered staff to see their own screenshots which have been taken by the application. This page contains the following features.

- Filter by Date: Through this feature, staffs are able to filter through their time tracking records by data. Simply select the desired date and the appropriate time tracking record will then be displayed
- Daily: This button allows staff to view their daily time tracking record.
- Weekly: This button allows staff to view time tracking records for up to 1 week.
- Monthly: This button allows staff to view time tracking records for up to 1 month.
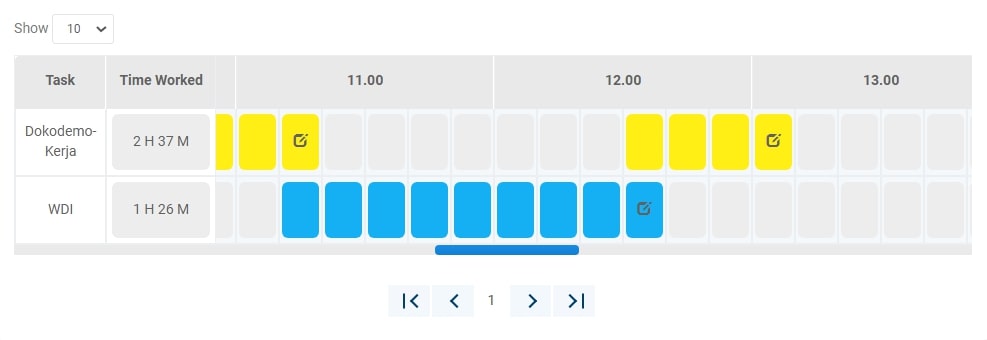
- Time Tracker: The first table of the dashboard page shows the staff’s daily work time record.
- Show: Staff can choose how many rows of tasks are shown
- Task: Staff can see the name of the tasks they have worked
- Time Worked: Staff can view the total time spent on each task
- Time Column: Staff can see details related to the minutes and hours spent on a specific task
- Pagination: This feature can be used to navigate to the next page when the data exceeds the number chosen on the “Show” dropdown.
- Total Time / Set Time: Displays the total work hour in a day and the set time determined by the admin.
- Comment: Staff can receive/reply to comments made by team leaders or admins.
- History Edited Time: Displays the records of edited work hours, if any.
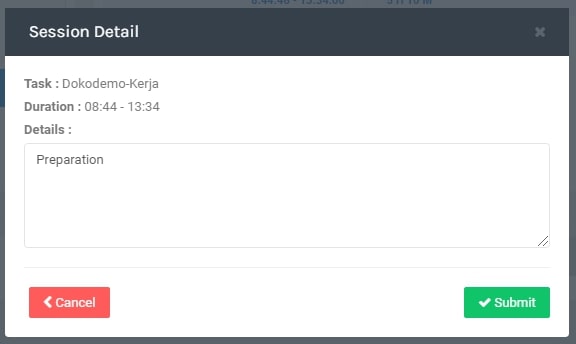
- Session Details: This feature can be used as a daily work log. A session appears whenever the staff presses the Start, then the Stop button. Even if the staff were to work on the same task, the session will be split when the stop button is pressed. The Edit button is used to fill in the session description.
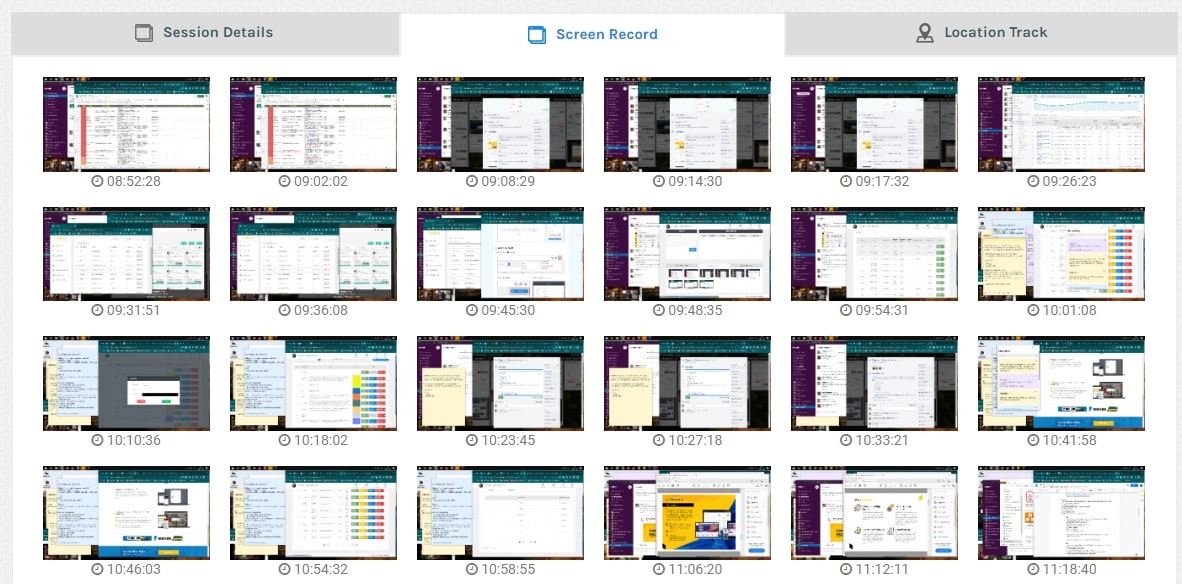
- Screen Record: This section displays all screenshots taken in a day. These screenshots are taken randomly at the interval of 3-10 minutes. The image resolutions are very low in order to protect the staff’s privacy to a degree.
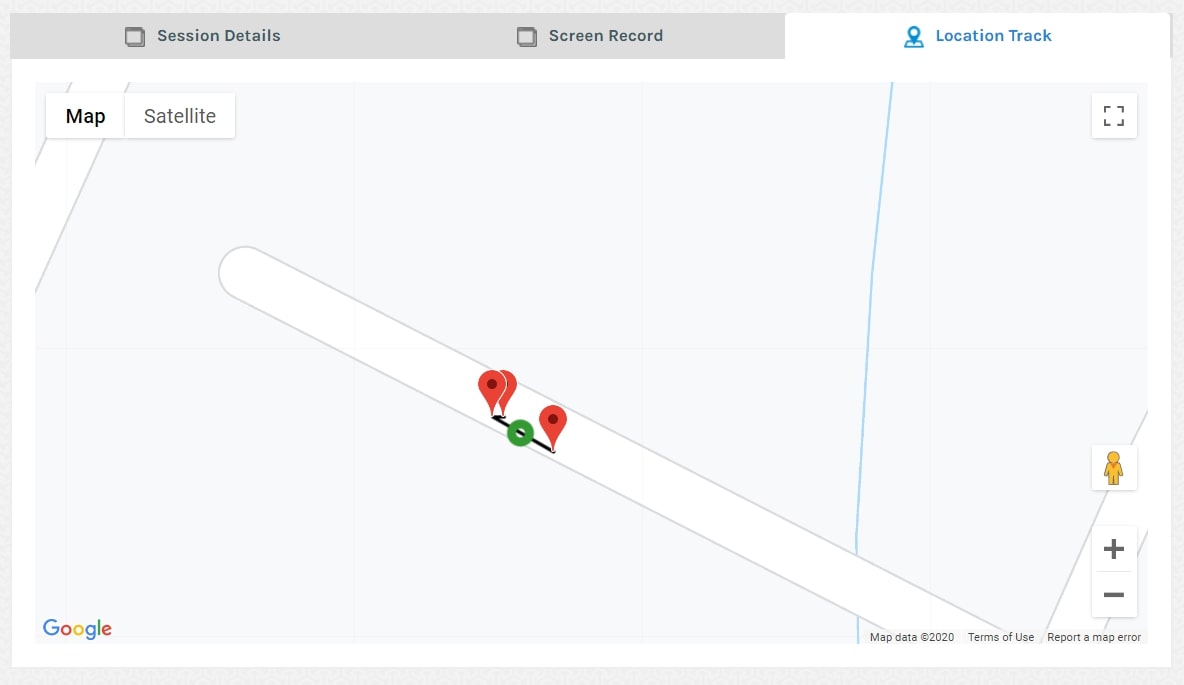
- Location Track: This feature can be used to track the staff location if they use the mobile version of Dokodemo-Kerja instead of the desktop version.
- The red pinpoint shows the staff’s location, and it can be clicked to reveal the date and time in which the staff is present at the location.
- The circular green icon moves from one pinpoint to another to show the route that the staff take.
-
Attendance Staff
Staff will not be able to see their own attendance record, but they can request day offs which can be accessed through the top navigation. When the “Request Day Off” button is clicked, an online form will appear.